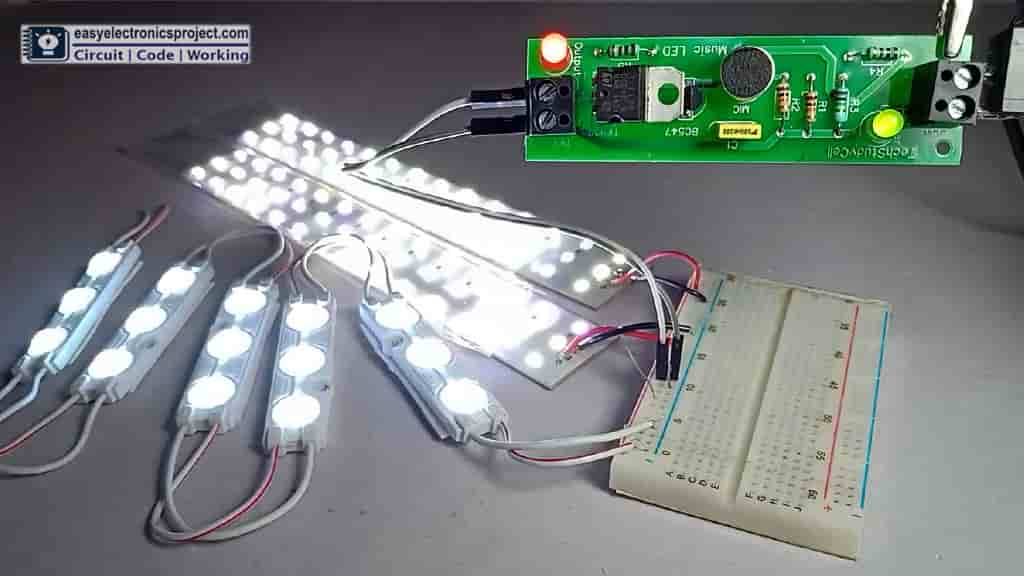
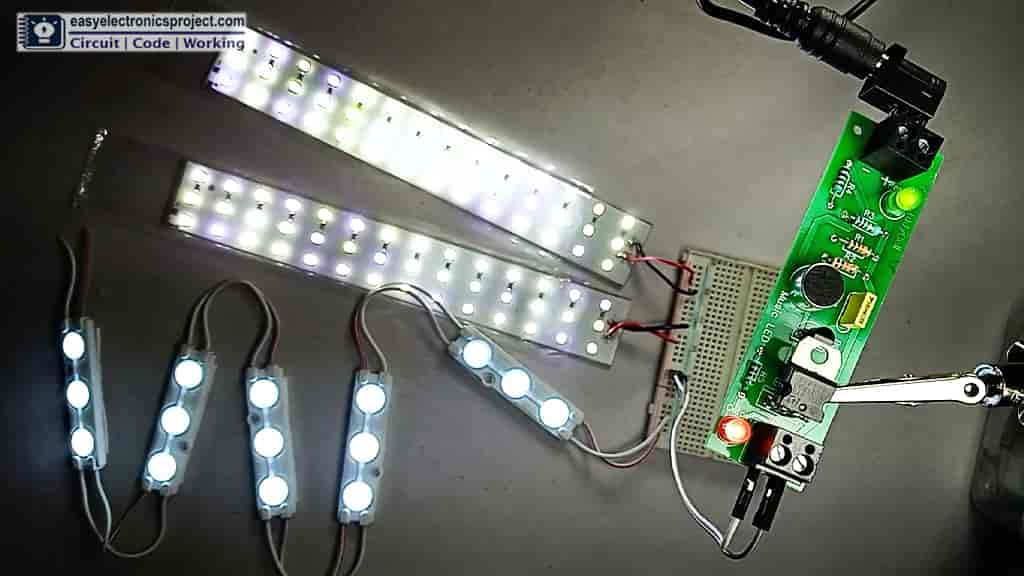
In this electronics project, I have shown how to make a Music Rhythm LED Flash Light circuit using the BC547, TIP122, and Microphone on the breadboard and design a PCB for this circuit. You can connect multiple LED strip lights with this circuit and all connected LED strips will blink with the music rhythm.
The microphone will sense the music rhythm and generate an electric pulse which will amplify by the transistors BC547 & TIP122. Then the connected LED strip will start blinking.
I have shared the circuit diagram, breadboard schematic and all the required details for this Music Rhythm LED Flasher project, so you can easily make this Music Rhythm LED Flash Light at home.
Circuit of Music Rhythm LED
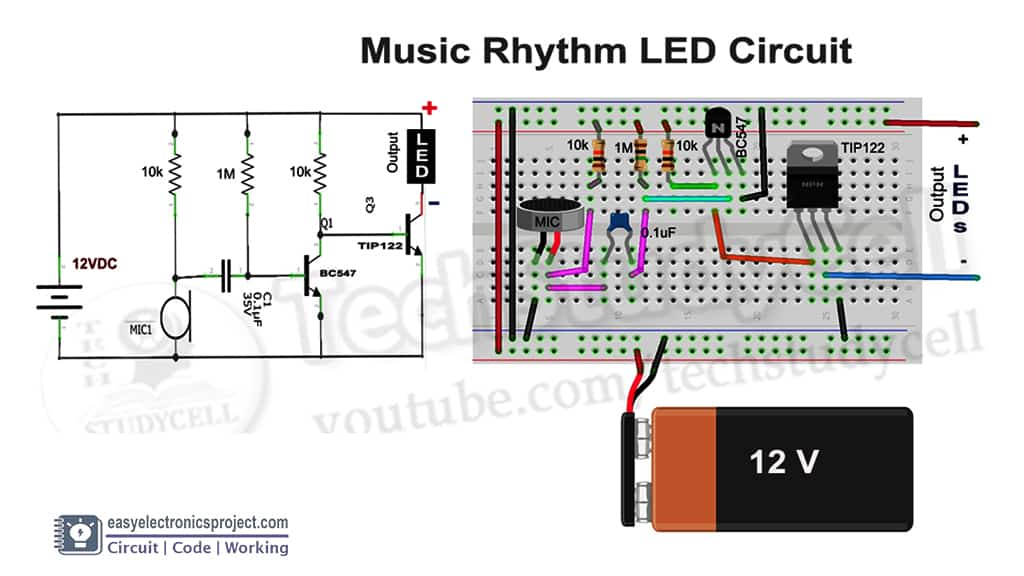
How the music rhythm LED circuit works:
- The music rhythm is sensed by the microphone and the microphone converts the sound into electric pulses.
- Then the electric pulses are fed to the base of the BC547 NPN transistor, the transistor amplifies the electric pulse signal.
- After that, the amplified signal is fed to the base of the TIP122 NPN power transistor. For the positive pulse at the base, the TIP122 transistor turns on.
- The 12V LED strips are connected with the collector pin of the TIP122 transistor. So when the TIP122 transistor turns on the current can flow through the 12V LED strips, and the LED strips turn on. When the TIP122 transistor turns off the current can not flow through the 12V LED strips, so the LED strips turn off.
Required Components:
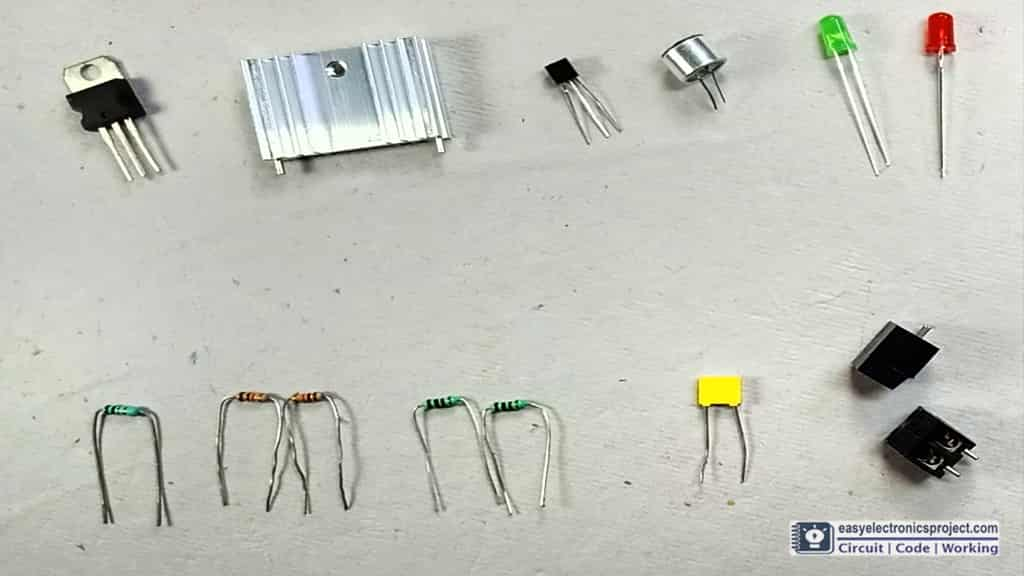
- 1k 0.25-watt Resistors 2no
- 10k 0.25-watt Resistors 2no
- 1M 0.25-watt Resistor 1no
- BC547 NPN Transistor 1 no
- TIP122 NPN Power Transistor 1no
- 0.1uF Capacitor 1 no
- LEDs 5-mm 1.5Volt 2no (optional)
- Condenser Microphone 1no
- Terminal Connectors
- 12volt LED strips or flashlight
- 12V DC Adapter
Designing the PCB
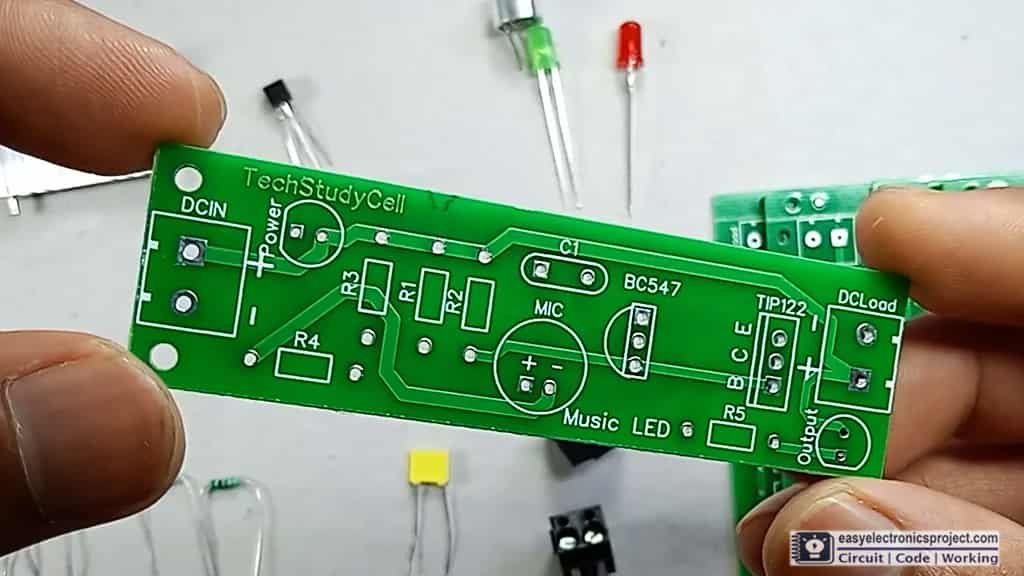
After testing the circuit on the breadboard, I have designed the PCB for this electronics project.
You can download the PCB Gerber file and order it from PCBWay.com
About PCBWay and their services
You can instantly get the quotation of your PCB and PCBA before placing the order from PCBWay. You can also check the order fabrication and processing status online in your PCBWay account panel. After the PCBs are sent out to your address, you can track your order shipping status online.
At PCBWay, all the boards will go through the most stringent tests other than the basic visual check. They use Flying Probe Tester, X-Ray Inspection Machine, Automated Optical Inspection (AOI) Machine for testing and inspecting the PCB to ensure the quality.
For the online instant quote page please visit – pcbway.com/orderonline
Inspect your Gerber file before placing the order – OnlineGerberViewer
You may order as small as 5pcs of PCB from PCBWay. And whenever you have any problems, you can always reach a live customer service person from PCBWay to respond to your emails or messages.
Steps to order PCB from PCBWay
To order the PCB first visit PCBWay.com.

Then enter the following details:
- PCB Size (Length & Width) in mm & PCB quantity
- Select masking color for the PCB
- Select country and shipping method
- Click on the “Save to Cart” button
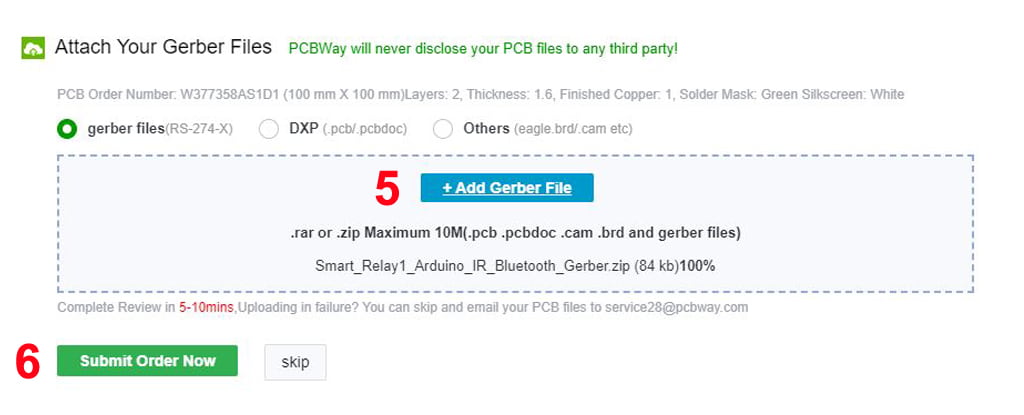
Now click on the “Add Gerber Files” to upload the PCB Gerber file.
Then click on the “Submit Order Now” to place the order.
After that they will review the Gerber file and accordingly confirm the order.
In my case, I have received the PCB within a week. It depends on the shipping method you have chosen.
Placing Components on the PCB
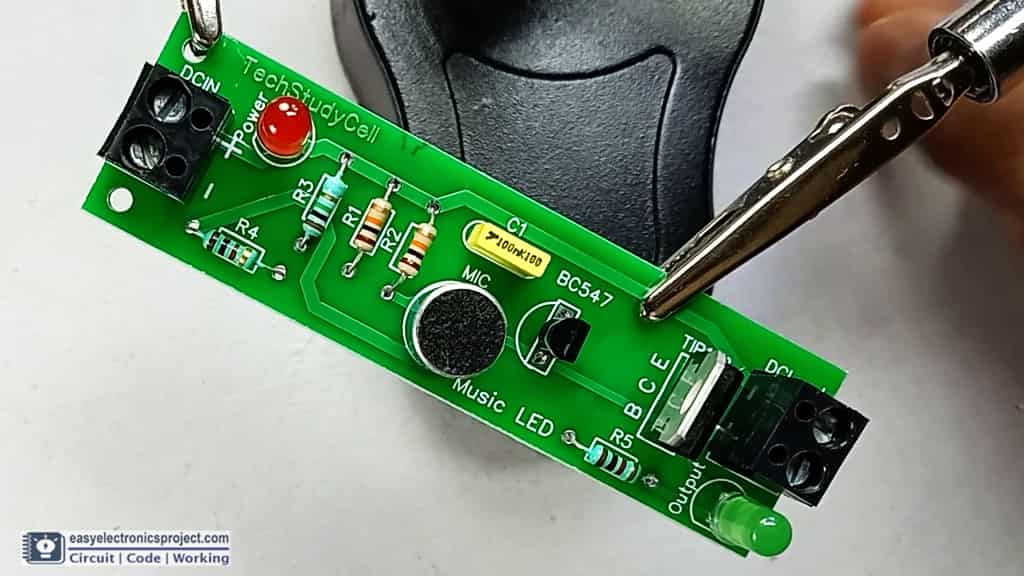
Now, place all the components as marked on the PCB. After that solder all the components.
Testing the Music Rhythm LED Circuit
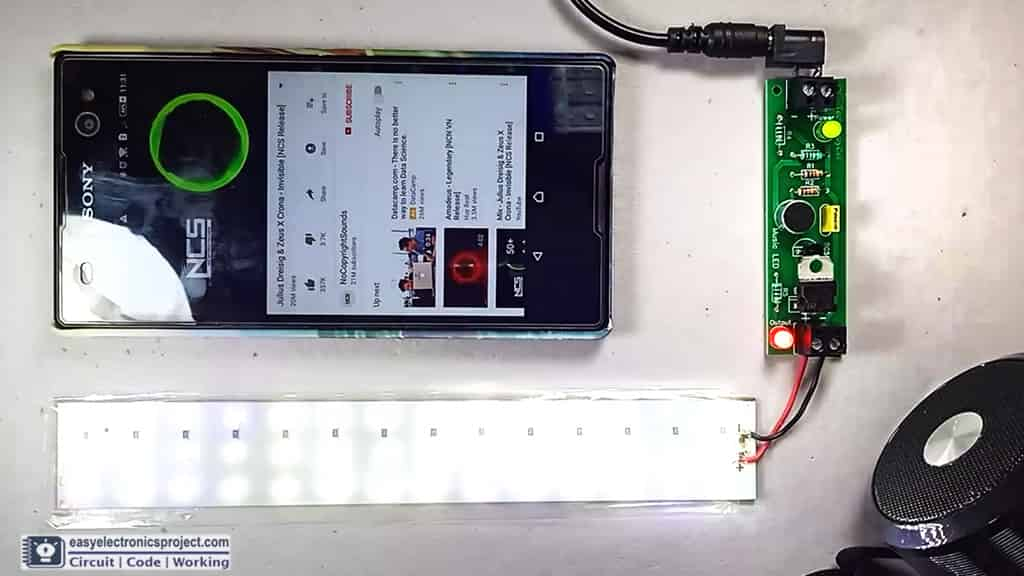
Connect any 12V LED strip at the output. You can also connect multiple LED strips in parallel.
Then connect the 12V DC supply at input. The current rating depends on the TIP122 transistor. You can also use MOSFET instead of the transistor.
Now the LED strip should blink with the music rhythm.
Please share your feedback on this mini-project and also let me know if you have any queries.
You can also visit our YouTube channel for more such useful electronics projects.
I hope you have liked this project, Thank you for your time.
