Description:
In this IoT project, I have shown how to control home appliances from Google Assistant by connecting the Google Assistant with Blynk App using the IFTTT. With this IoT based project, we can control the relay module from the smartphone using Blynk or Google Assistant.
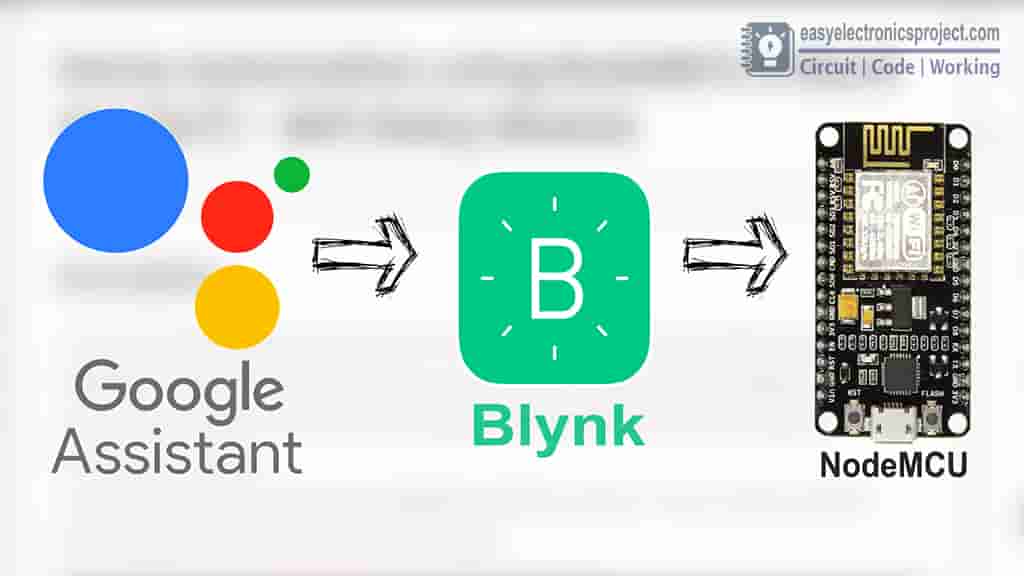
How the project works:
- If you say any phase in the Google Assistant, then it will generate a trigger in IFTTT.
- IFTTT will send the signal to Blink Cloud server through Websockets
- Blynk will control the NodeMCU to turn on or turn off the respective relays
Related Project: Alexa Home Automation using NodeMCU.
Circuit for this IoT project
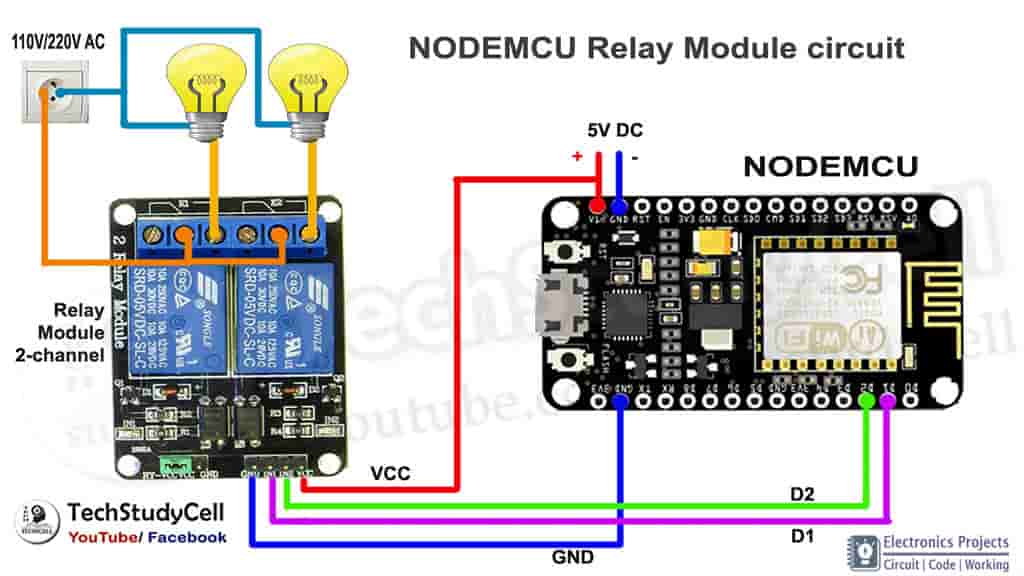
I have already explained how to control the relay module from Blynk App using NodeMCU in my previous project.
Please Click Here to visit my previous project on NodeMCU & Blynk to get the code and Blynk set up for this project.
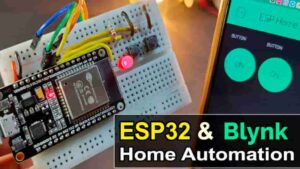
Tutorial video for this project
In this tutorial video, I have explained the followings:
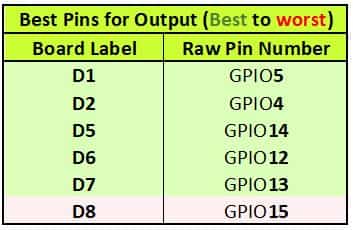
Blynk NodeMCU control Relay Circuit with GPIO pin details
Blynk app set up for this home automation project
Upload the Blynk example sketch from Arduino IDE
Connecting Google Assistant with Blynk using the IFTTT.
Connecting Blynk with Google Assistant
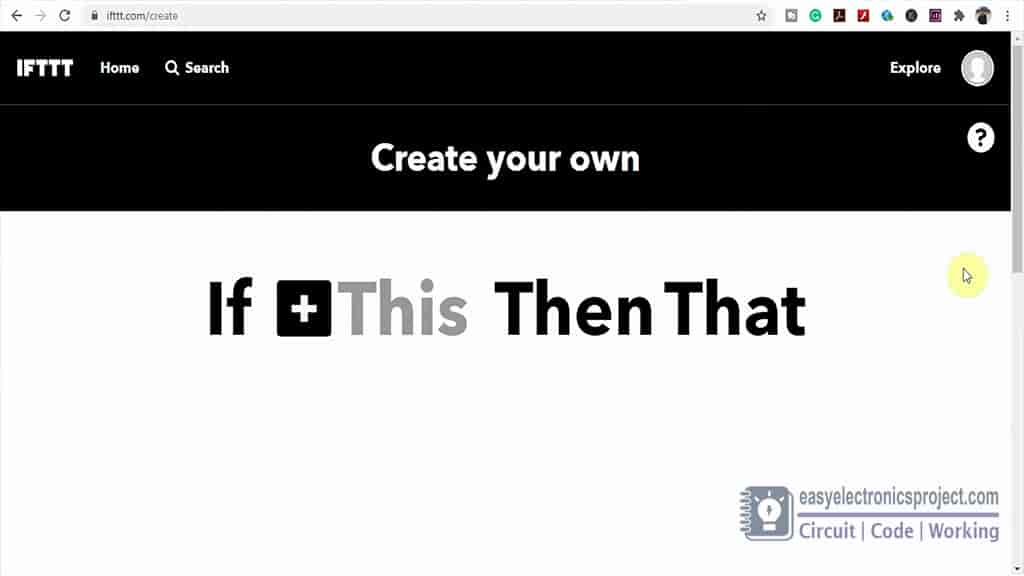
Here, I have used IFTTT to connect google assistant with Blynk.
Steps to connect Google Assistant with Blynk:
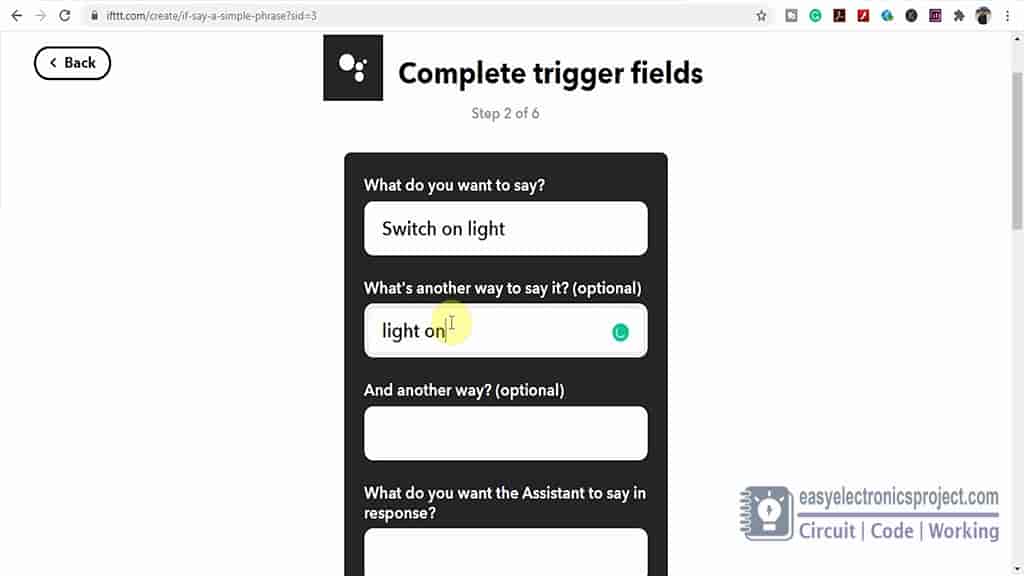
Open IFTTT and search for Google Assistant and enter what do you want to say to control the relay module and the response from the google assistant.
Then click on Create Trigger.
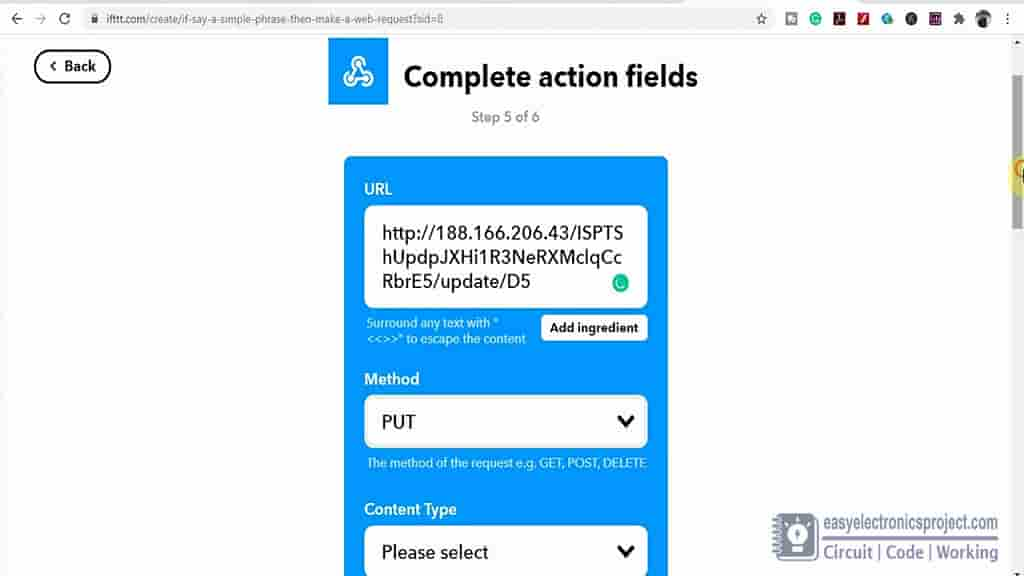
After that search for Webhooks. Now, to generate the URL I need the IP of the Blynk-cloud. So to get the IP, I have to open the command prompt and type ping blynk-cloud.com.
URL structure: http://(Blynk-cloud IP)/(Auth Token)/update/D(GPIO pin)
Method : PUT
Content Type : Application/json
Body :
[“0”] –> To turn on the Relay (Active Low)
[“1”] –> To turn off the Relay (Active Low)
Then click on the Create action.
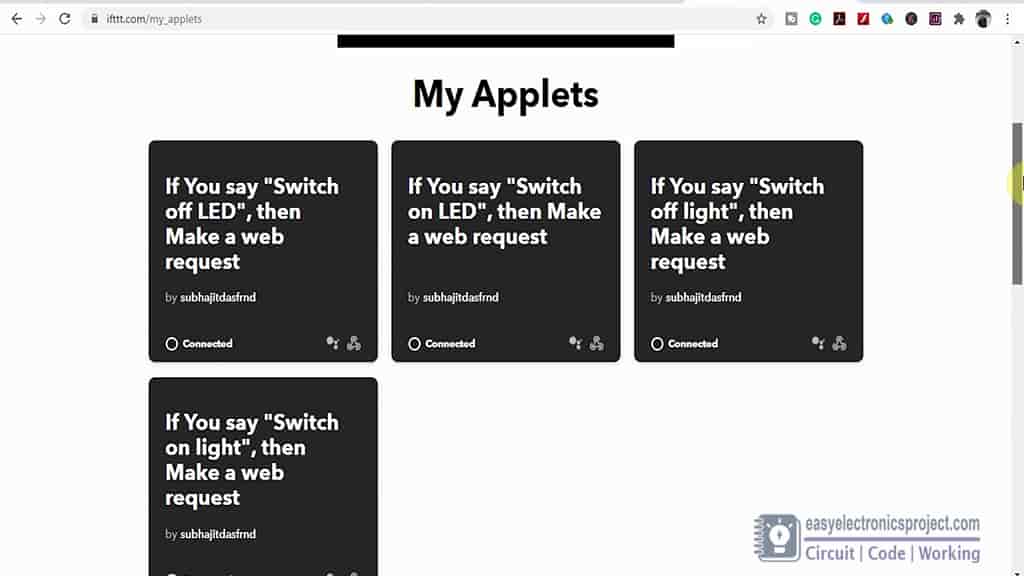
Thus, I have created 4 applets to control 2-channel relay module from google assistant. You can create multiple applets as per the requirement.
Google Assistant control Relay:
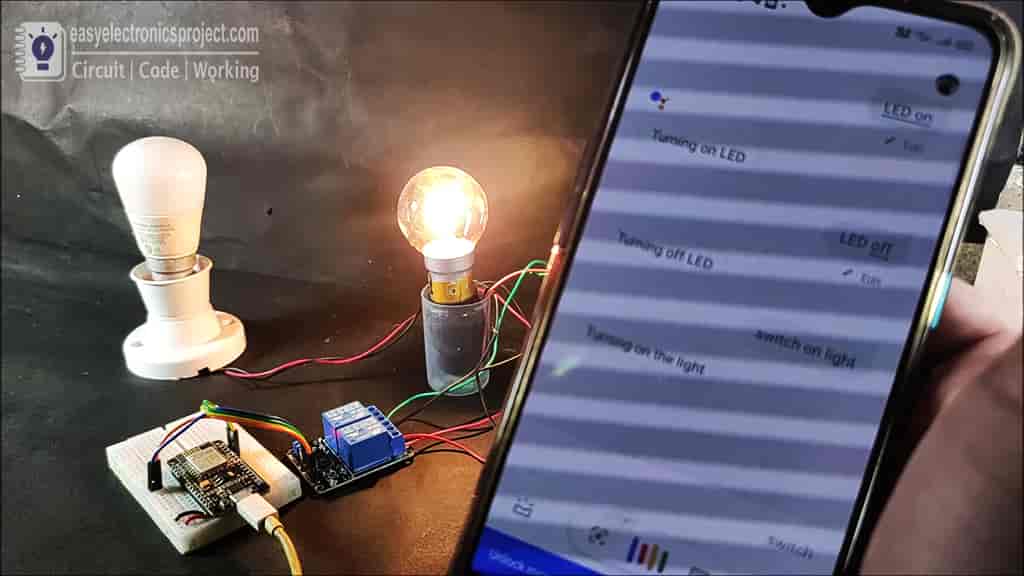
As per the applets I have created on the IFTTT, if I say “Switch on Light” the relay-1 will turn on, and to turn off the relay-1, I have to say “Switch off Light“.
And to control the relay-2, I have to say “Switch on LED” or “Switch off LED”.
Blynk control Relay:
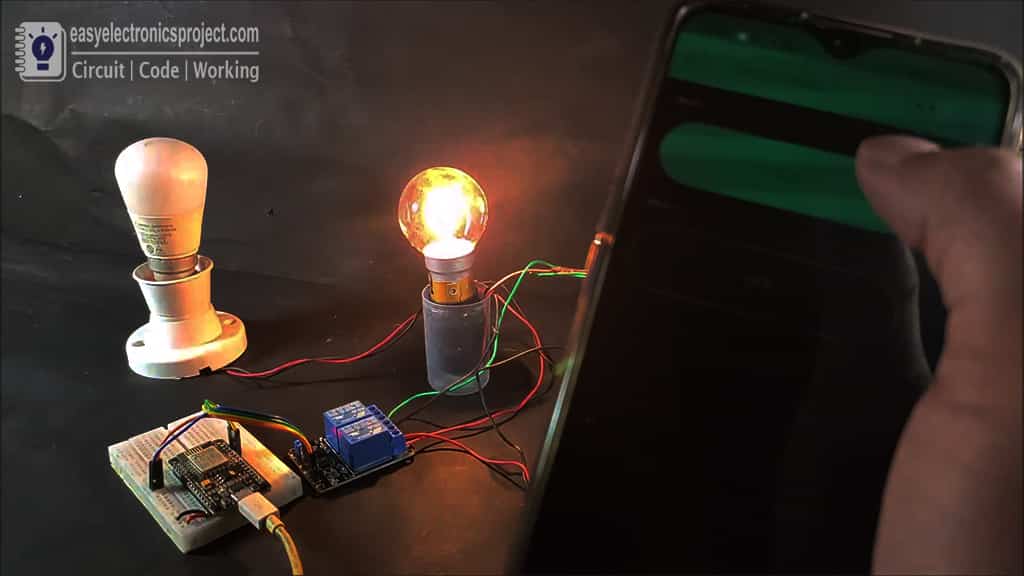
I can also control the relay module from Blynk App. So if I have internet in my smartphone, then I can control the relay module from anywhere in the world.
Click Here for more such IoT based Smart Home project.
You can also subscribe to our newsletter to receive more such useful electronics projects through email.
Please do share your feedback on this IoT based project. Thank you for your time.

