Description:
In this ESP32CAM project, I have made the ESP32CAM Face Recognition Door Lock System. You can enroll multiple faces in the esp32cam face detection automatic door lock. If it detects any enrolled face, the door will unlock automatically.
So this is a very useful smart home project using the esp32 camera module.
Circuit of the ESP32CAM Face Recognition Lock
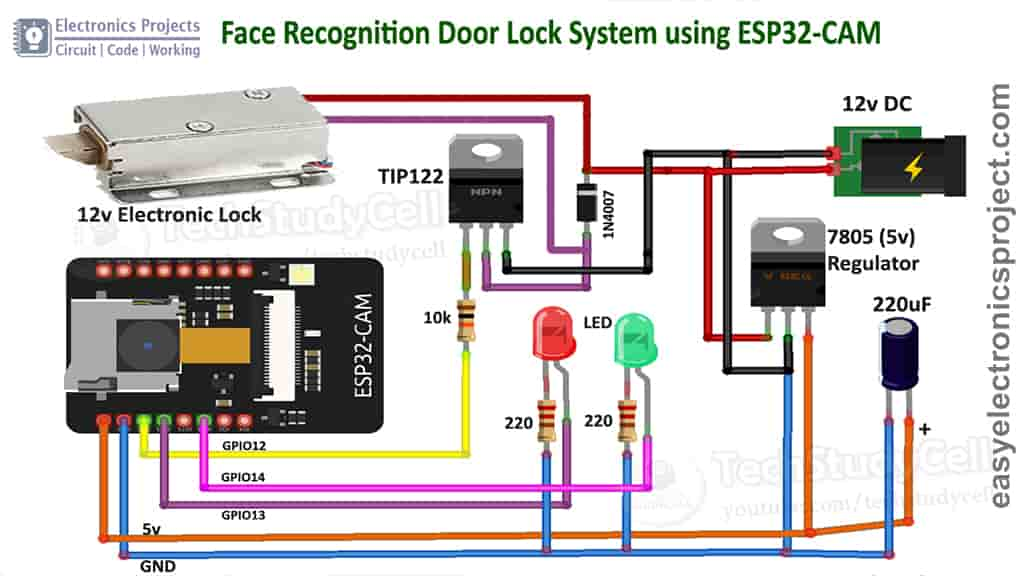
You can easily design this smart door lock with the camera using a 12v electronic lock, ESP32 CAM module, and some basic electronics components.
Required Components for Face Detection Door Lock
- ESP32-CAM board
- Electronic door lock 12v
- 7805 voltage Regulator (5v)
- TIP122 NPN Transistor
- 10k Resistor (1no)
- 220-ohm Resistors (2no)
- Capacitor 220uF
- Diode 1N4007 (1no)
- LEDs 5-mm (2no)
- 12V DC adaptor
- FTDI232 USB to TTL conveter (for programming the esp32cam)
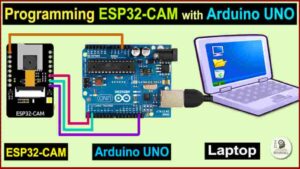
Programming ESP32-CAM board
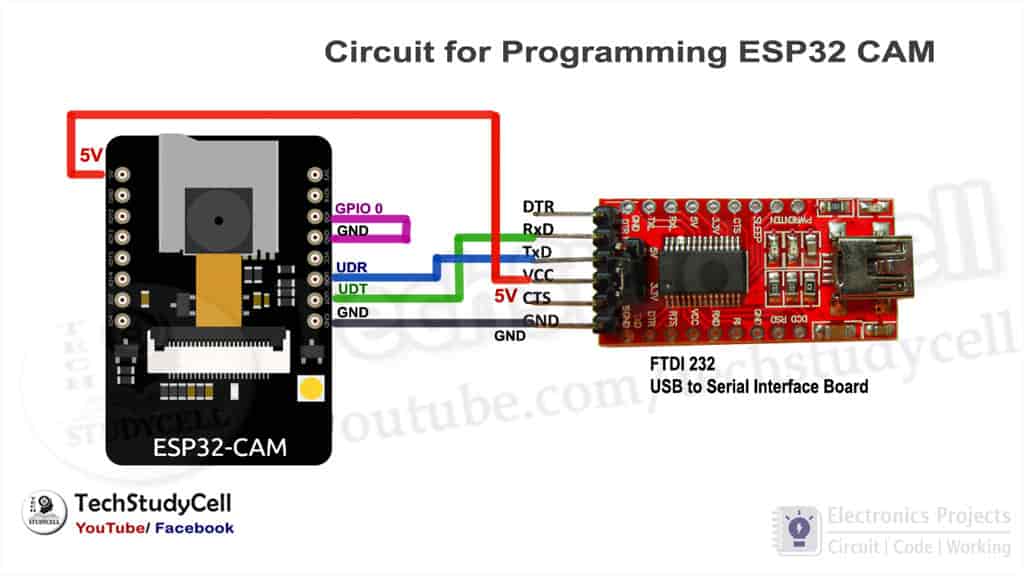
To program the ESP32CAM, I have used FTDI232 USB to Serial interface board. I have connected the FTDI232 with ESP32CAM as per the above circuit.
While uploading the code we have to connect GPIO 0 with the GND pin of ESP32CAM.
Before uploading the code to ESP32CAM, please check the following setting:
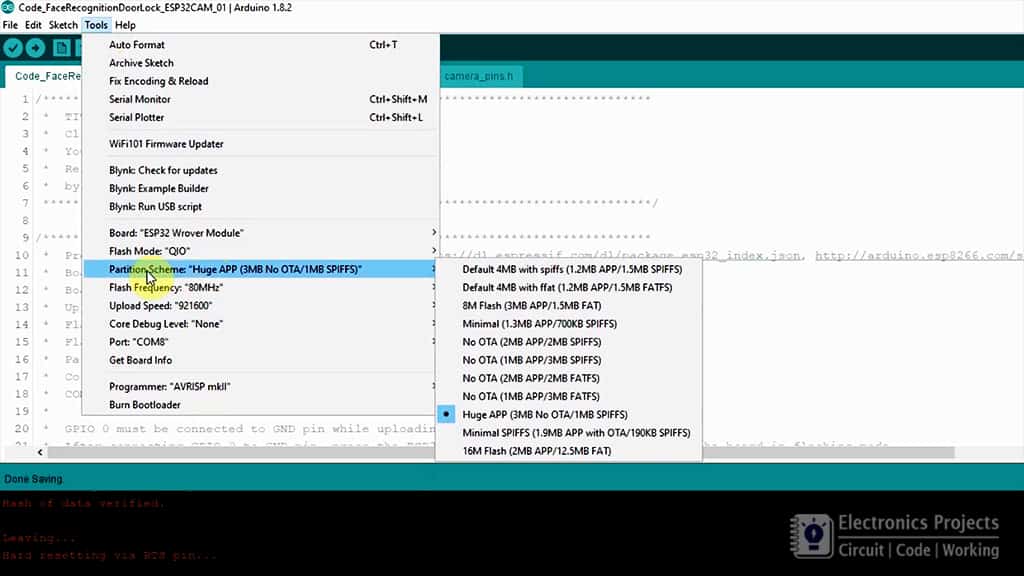
- Update the Preferences –> Aditional boards Manager URLs: https://dl.espressif.com/dl/package_esp32_index.json, http://arduino.esp8266.com/stable/package_esp8266com_index.json
- Board Settings:
- Board: “ESP32 Wrover Module”
- Upload Speed: “921600”
- Flash Frequency: “80MHz”
- Flash Mode: “QIO”
- Partition Scheme: “Hue APP (3MB No OTA/1MB SPIFFS)”
- Core Debug Level: “None”
- COM Port: Depends On Your System
- GPIO 0 must be connected to GND pin while uploading the sketch
- After connecting GPIO 0 to GND pin, press the ESP32 CAM on-board RESET button to put the board in flashing mode
Tutorial video of ESP32CAM Face Recognition
In this tutorial video, I have shown how to make this DIY Face Recognition Door Lock System using esp32 cam step by step. For better understanding please watch the complete video.
Get the IP from ESP32-CAM
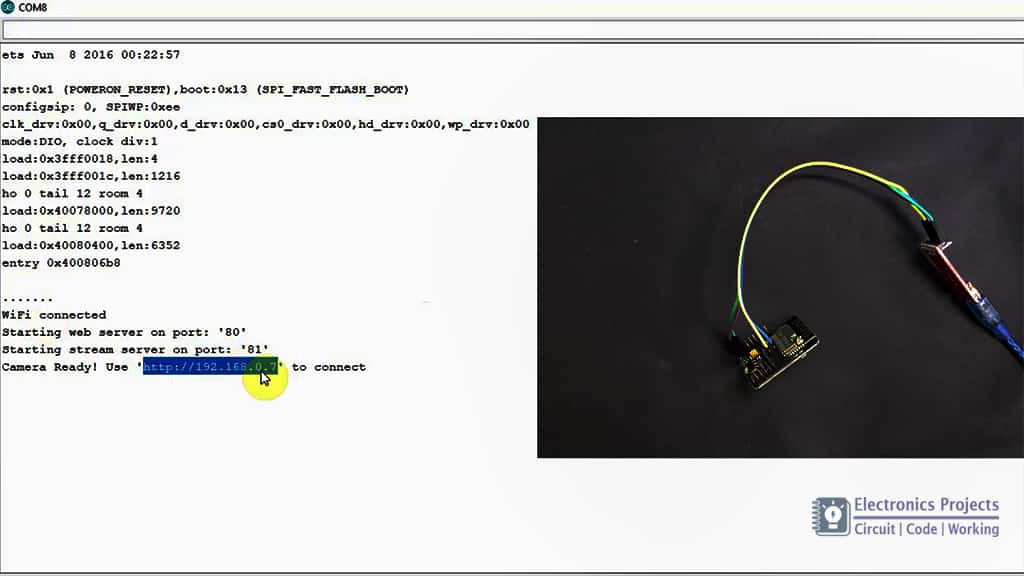
1. After uploading the code disconnect GPIO 0 from GND pin.
2. Open Serial Monitor with Baud rate 115200.
3. Press the RESET button on the ESP32CAM board
4. Copy the IP Address from the last line.
Now connect all the components as per the circuit diagram. And give the 12v DC supply to circuit.
After that open any browser, then type the IP address to start the stream.
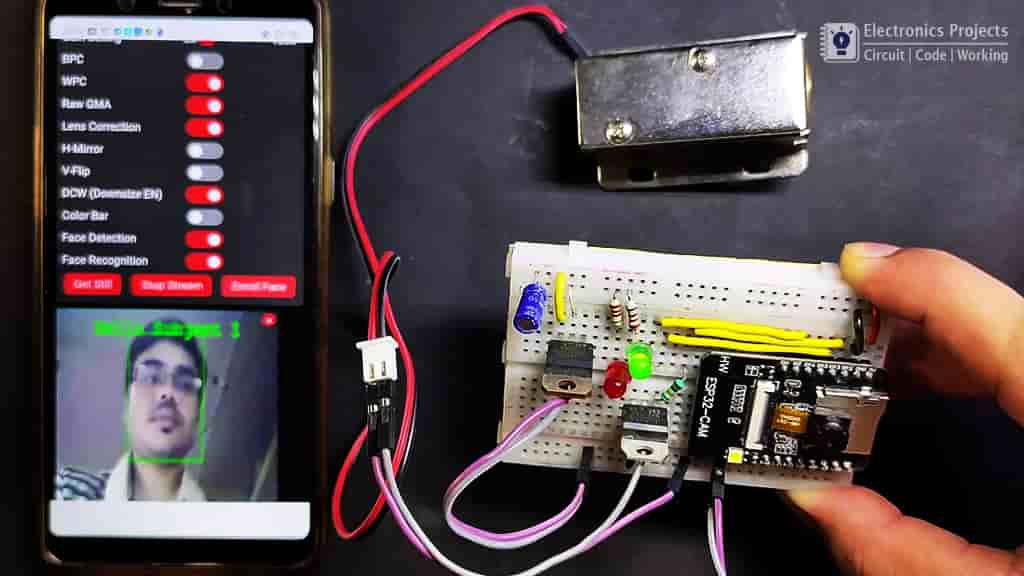
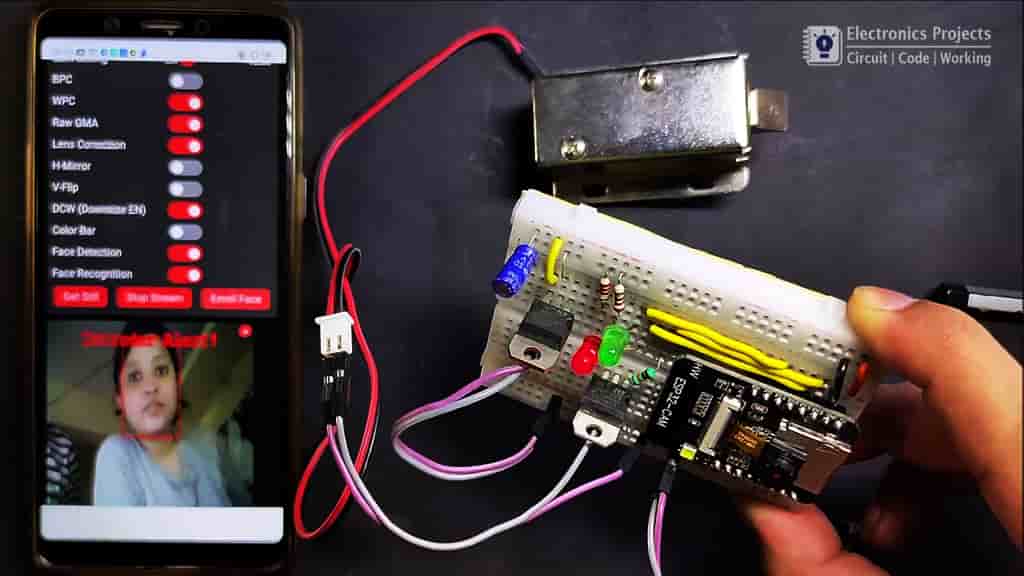
Now, we have to enroll faces.
1) Click on the Start Stream.
2) Turn on Face Detection and Face Recognition.
3) Click on Enroll Face.
4) Then ESP32CAM will take some sample pictures of the face.
5) At last, a green box will appear around the face.
In this way we can enroll multiple faces.
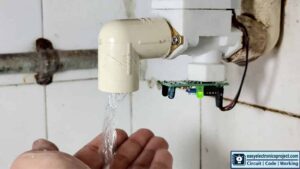
Finally, ESP32-CAM Face Recognition Lock is ready
Now, if the ESP32 CAM detects any enrolled face, it will unlock the door and Green LED will turn on for 6 seconds.
If the face does not match with the enrolled face, the door will remain lock as you can see in the above picture.
I hope you like this Smart home project using ESP32-CAM board.
You can also subscribe to our newsletter to receive more such useful electronics projects through email.
Please do share your feedback on this ESP32 project. Thank you for your time.