Atmega328P microcontroller:
The ATmega328P is a high-performance picoPower 8-bit AVR RISC-based microcontroller having 32KB ISP flash memory with read-while-write capabilities created by Atmel from the megaAVR family.
Atmega indicates the family name
32 indicates the 32 KB Flash Memory
8 indicates an 8-bit processor
P indicates picoPower (Consumes very low power)
Atmega328P Pinout
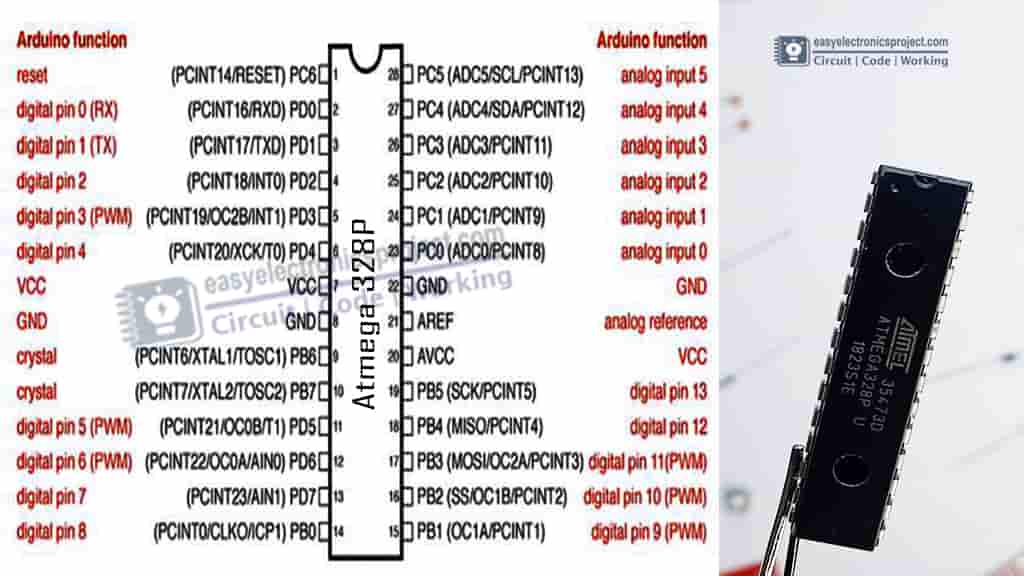
I have mentioned all the Atmega328 pinout details with related Arduino functions. So this pinout diagram will be very helpful as you can easily identify the digital and analog I/O pins of the Atmega328P microcontroller.
Atmega328P without Arduino circuit
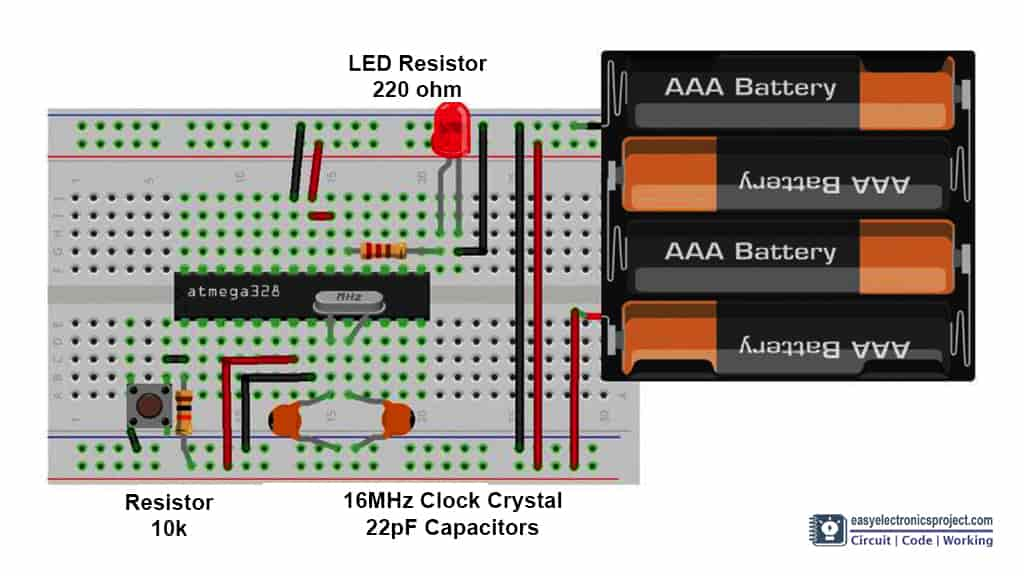
Before designing the DIY Arduino PCB, I have made the complete circuit on the breadboard for testing. You can also use a 5V mobile charger to supply the circuit.
In this tutorial video, I have explained how make Arduino circuit on breadboard using Atmega328P microcontroller.
Required Components
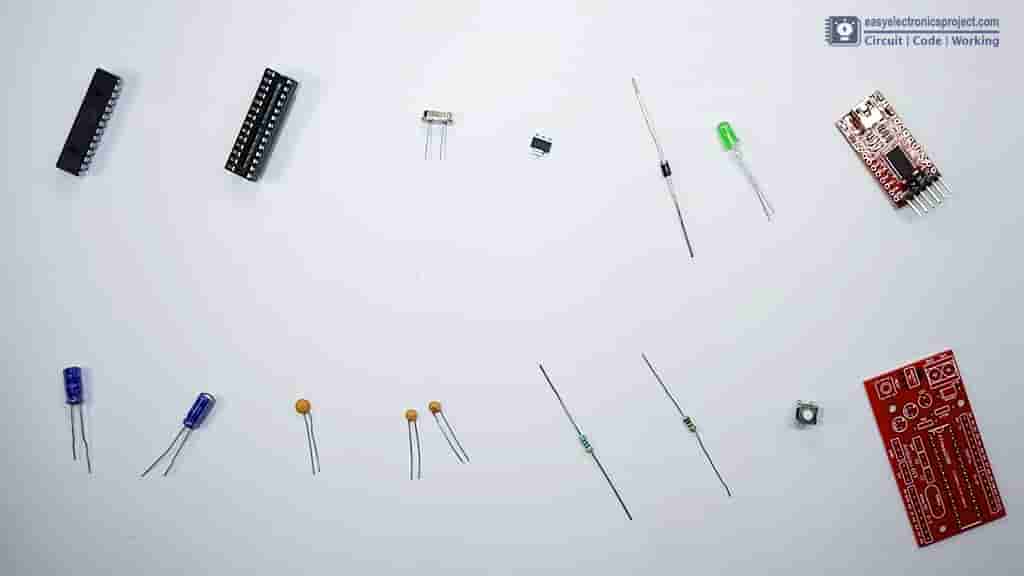
- ATmega328P with bootloader
- 16MHz Crystal
- LED 5-mm
- 10k & 470-ohm Resistors
- 22pF Capacitors 2no
- 100nF (104) Capacitor
- 10uF Capacitors 2no
- AMS1117 5v Regulator
- Push switch
- IN4001 Diode
- 2mm Pitch Female BERG Strip
- FTDI232 USB to Serial
- Arduino PCB
Designing the PCB
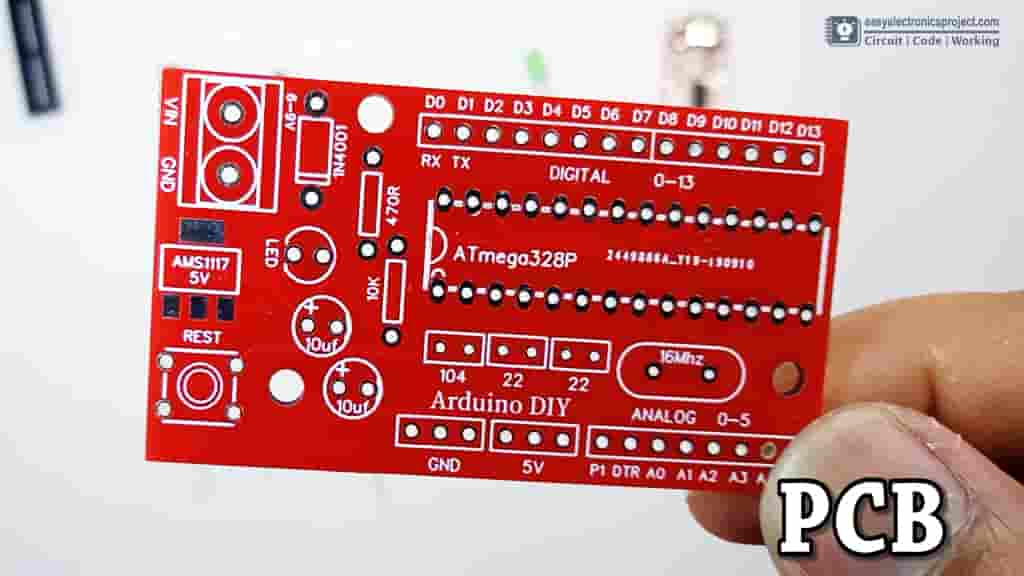
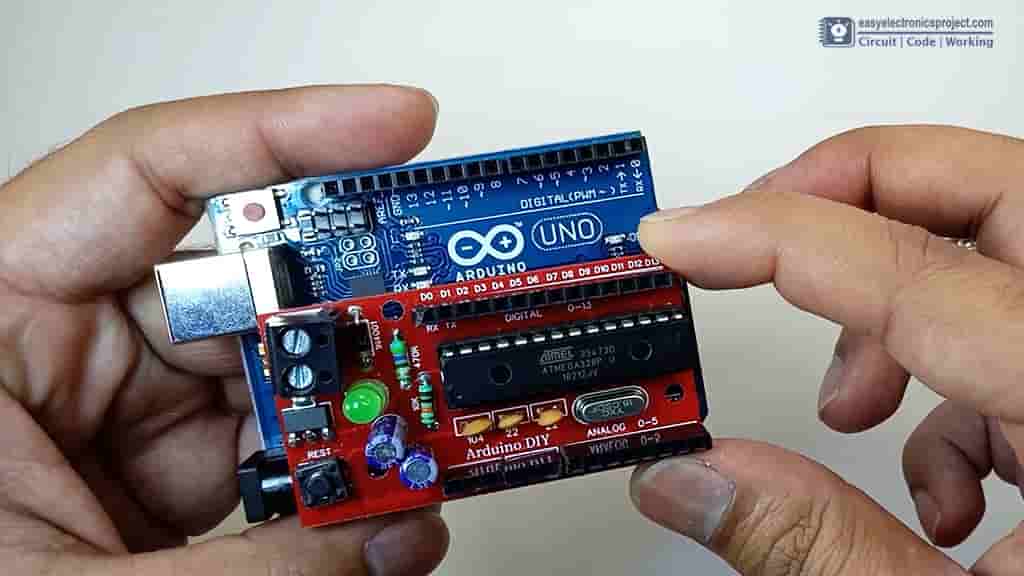
After testing the circuit on the breadboard, I have designed the PCB for this Atmega328P project.
This circuit has all the features of Arduino UNO, but the size is smaller and the cost is also low.
I have ordered the PCB from PCBWay.com. The PCB quality is very good in this affordable price range. You can also try PCBWay.com to order any custom design PCB.
About PCBWay and their services
- PCB Prototyping and Manufacturing
PCBWay not only produce FR-4 and Aluminum boards, but also advanced PCB like Rogers, HDI, Flexible and Rigid-Flex boards, with very reasonable price.
For the online instant quote page please visit – pcbway.com/orderonline
Inspect your Gerber file before placing the order – OnlineGerberViewer - PCB assembly
The SMT & THT assembly starts from only $30 with the free stencil and free worldwide shipping.
The components can be sourced and provided by us, or by clients themselves
Rough quote online – pcbway.com/pcb-assembly - Layout and design
Partnering with quality service providers to offer design services – pcbway.com/design-services - Open-source community
You can explore different useful PCB projects – pcbway.com/project
For more details please visit the following articles.
Why PCBway
PCB Capabilities
High-Quality PCB
Steps to order PCB from PCBWay
To order the PCB first visit PCBWay.com.

Then enter the following details:
- PCB Size (Length & Width) in mm & PCB quantity
- Select masking color for the PCB
- Select country and shipping method
- Click on the “Save to Cart” button
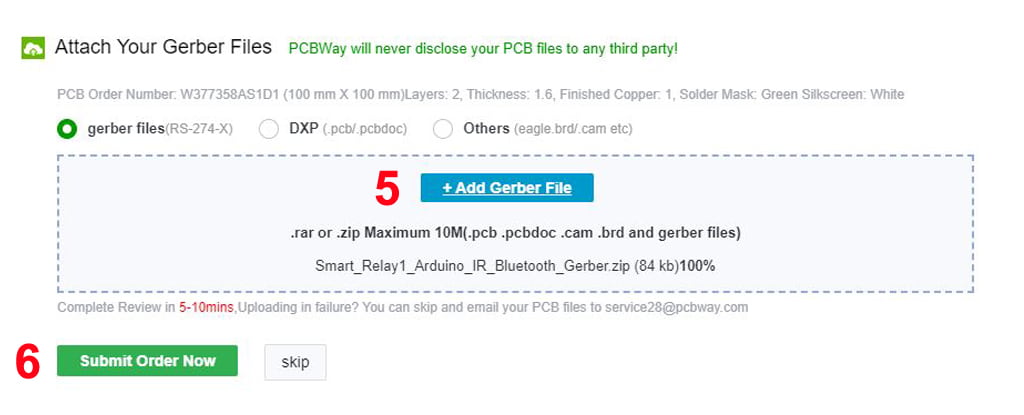
Now click on the “Add Gerber Files” to upload the PCB Gerber file.
Then click on the “Submit Order Now” to place the order.
After that they will review the Gerber file and accordingly confirm the order.
In my case, I have received the PCB within a week. It depends on the shipping method you have chosen.
Placing Components on the PCB
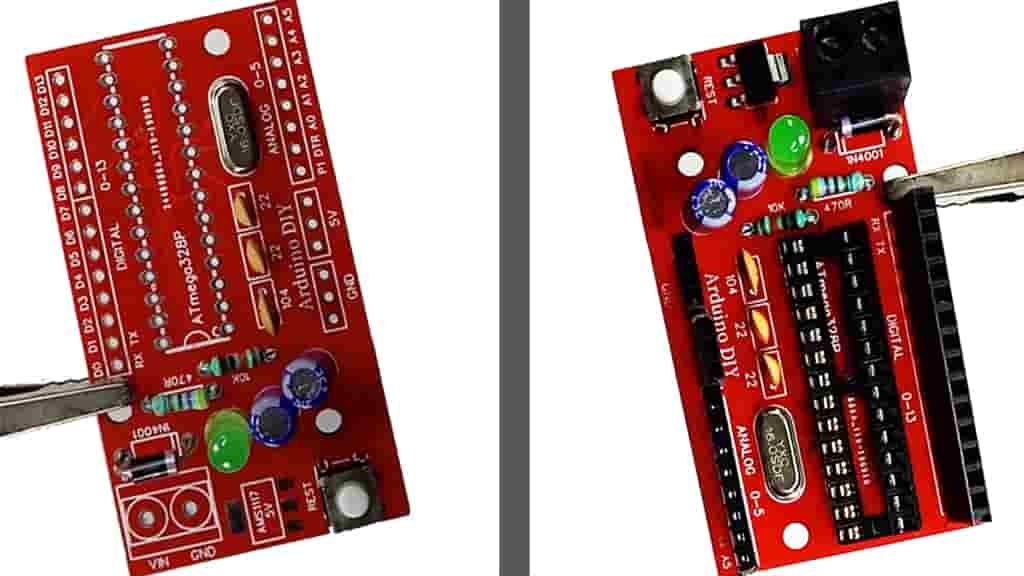
Now, place all the components as marked on the PCB. After that solder all the components.
Atmega328P programming
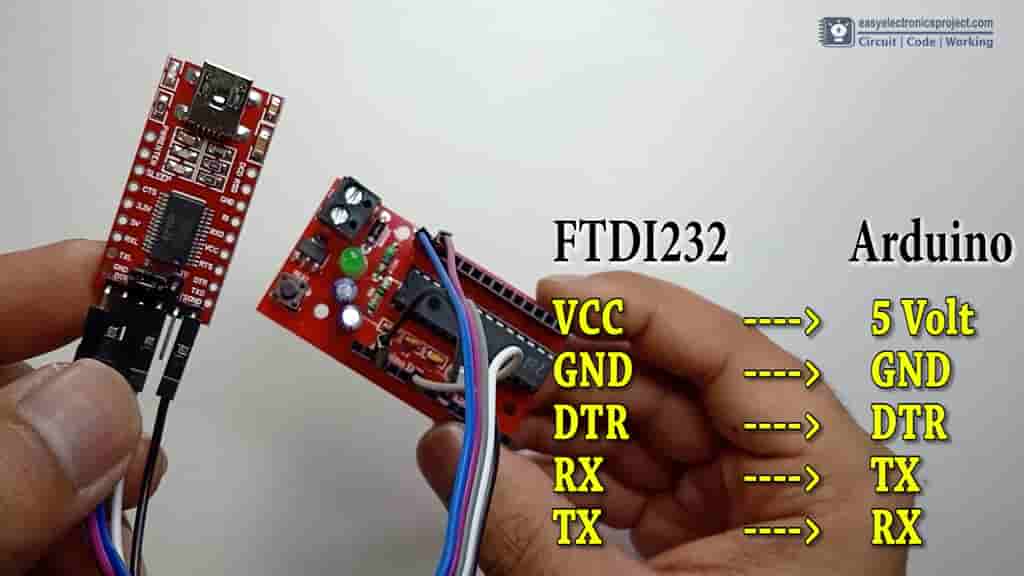
Here, I have used FTDI232 to program the Atmega328 microcontroller. Connect the FTDI232 USB to TTL converter with microcontroller as shown in the picture above.
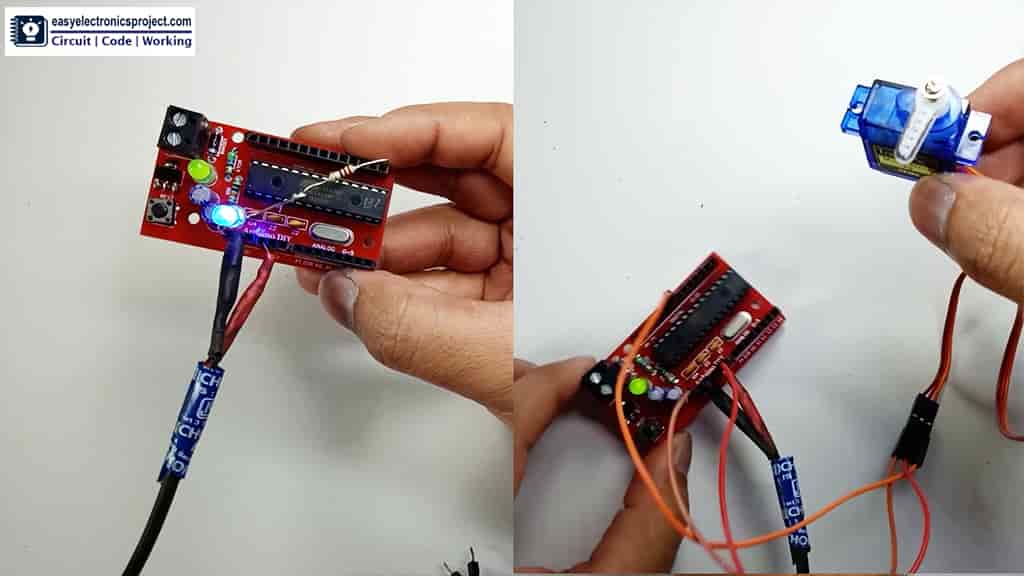
Thus you can upload any Arduino sketch to the microcontroller and use this circuit for any arduino project instead of Arduino UNO.
On the PCB I have used a 5V regulator, so you can connect 5V to 12V DC supply at input.
Please share your feedback on this Arduino project and also let me know if you have any queries.
You can also visit our YouTube channel for more such useful electronics projects.
I hope you have liked this project, Thank you for your time.