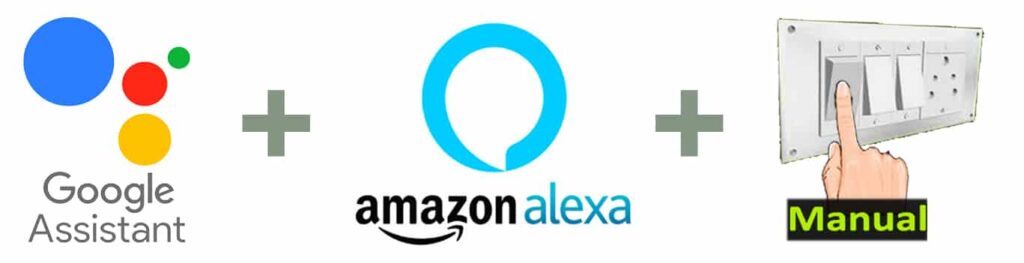
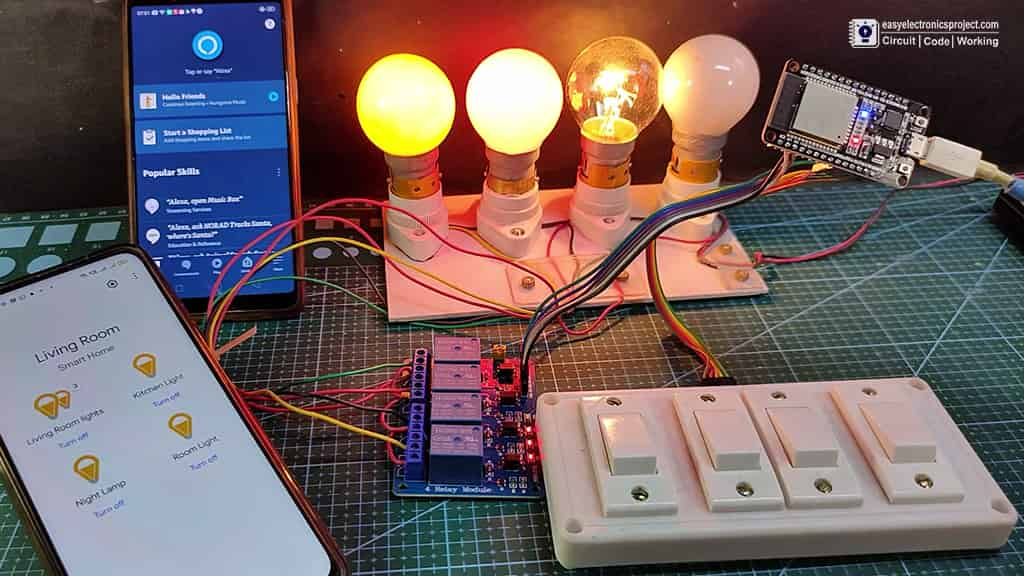
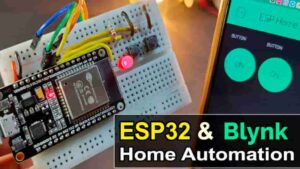
In this IoT project, I have explained how to make a home automation project using ESP32 Alexa Google Home to control appliances from mobile. You can use Google Assistant, Amazon Alexa, and manual switches to control 3 appliances from anywhere in the world with this internet of things project.
And you don’t need any Google Nest or Amazon Echo Dot for this voice control smart home project.
By using the Google Home or Alexa App, you can control the relays and monitor real-time feedback from anywhere. Wi-Fi will be automatically connected to the ESP32 if the network is available.
Throughout the project, I have used only FREE tools. By following these steps, you can easily create this Home Automation System with Alexa and Google Home to control the relays with voice commands.
Required Components for the ESP32 IoT projects
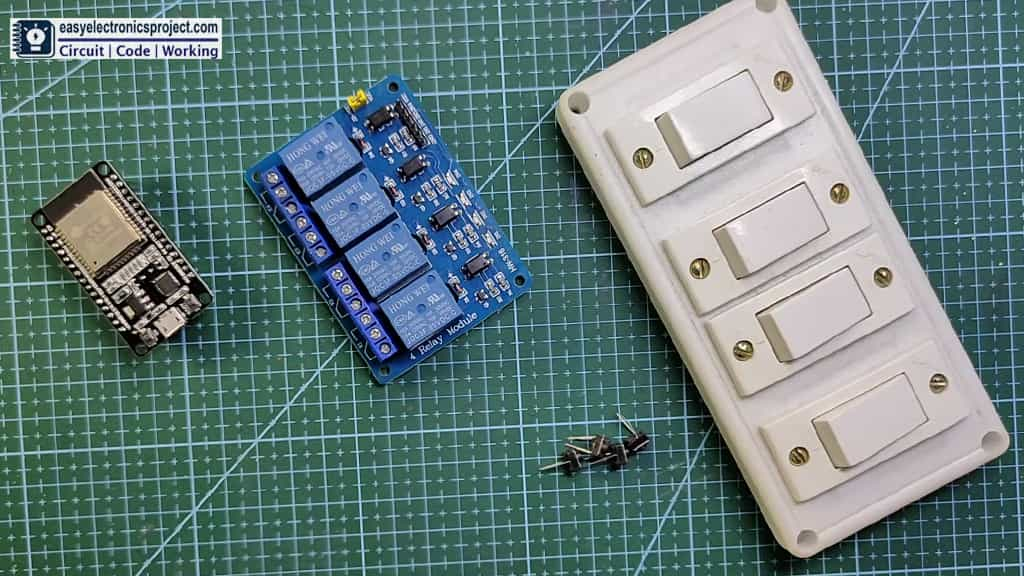
- ESP32 DevKIT V1
- 4-channel 5V SPDT Relay Module
- Manual Switches or Pushbuttons
- Amazon Echo Dot (optional)
- Google Nest Mini (optional)
To make the circuit compact, you can also use PCB for this project, which I will discuss in the following steps.
Circuit of the ESP32 Home Automation project
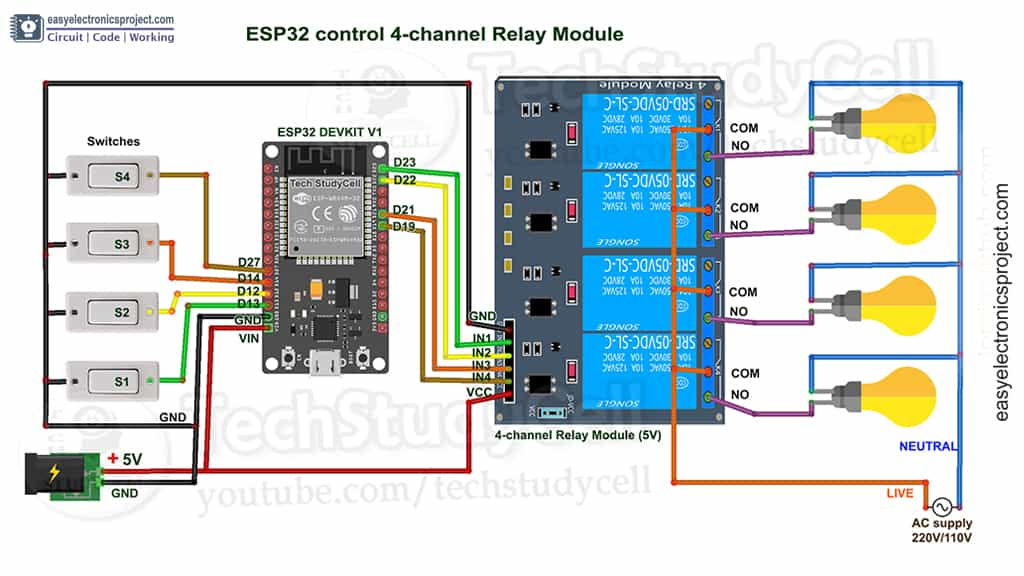
The circuit of this ESP32 home automation project is very simple.
I’ve used GPIOs D23, D22, D21 & D19 to control the 4-channel relay module.
The switches connected to GPIOs D13, D12, D14 & D27 are used for controlling the relay module manually.
Rather than using pull-up resistors with each switch, I have used the INPUT_PULLUP function in Arduino IDE.
Now, If you use pushbuttons (momentary) instead of switches, then refer to the following circuit.
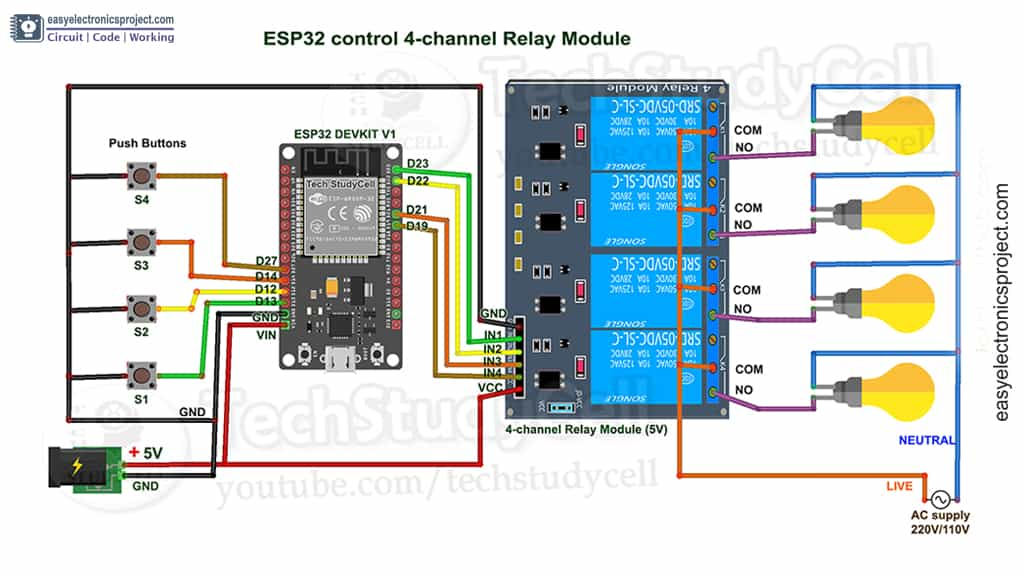
According to the code, when the control pins of the relay module receive a LOW signal, the respective relay turns on, and when the control pin receives a HIGH signal, the relay turns off.
The circuit is powered by a 5V 5A DC power supply.
Tutorial video on ESP32 Alexa Google Home control Relay
I have covered all the following steps in the tutorial video.
- Control the relays with Alexa, Google Assistant, and switches.
- Adding devices to the Sinric Pro account
- Program ESP32 using Arduino IDE
- Connect Sinric Pro with the Amazon Alexa App.
- Connect Sinric Pro with the Google Home App.
PCB for this ESP32 Home Automation project
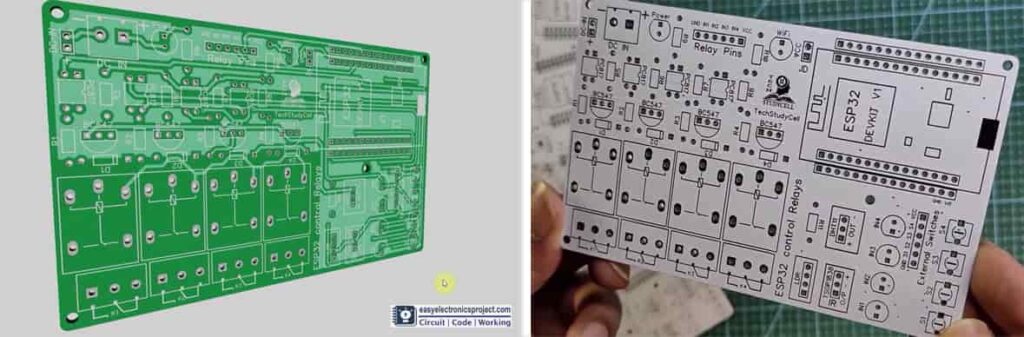
To make the circuit compact, you can also download the PCB Gerber file, and order it from PCBWay.com
About PCBWay and their services

PCBway is a very well-known PCB manufacturer for various types of PCB boards at very reasonable prices. They not only produce FR-4 and Aluminum boards, but also advanced PCBs like Rogers, HDI, Flexible and Rigid-Flex boards.
For the online instant quote page please visit – pcbway.com/orderonline
Inspect your Gerber file before placing the order – OnlineGerberViewer
You may order as small as 5pcs of PCB from PCBWay. And whenever you have any problems, you can always reach a live customer service person from PCBWay to respond to your emails or messages.
Steps to order PCB from PCBWay
To order the PCB first visit PCBWay.com.

Then enter the following details:
- PCB Size (Length & Width) in mm & PCB quantity
- Select masking color for the PCB
- Select country and shipping method
- Click on the “Save to Cart” button
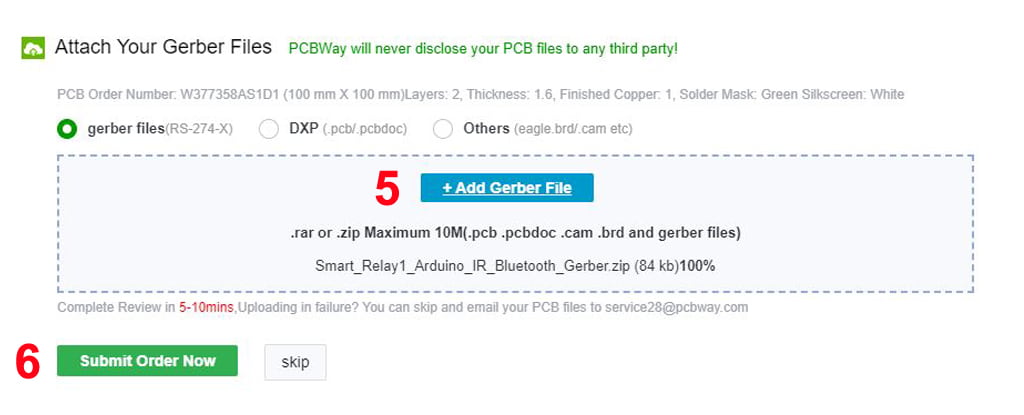
Now click on the “Add Gerber Files” to upload the PCB Gerber file.
Then click on the “Submit Order Now” to place the order.
After that they will review the Gerber file and accordingly confirm the order.
In my case, I have received the PCB within a week. It depends on the shipping method you have chosen.
Configure the FREE Sinric Pro account
I’ve used the free Sinric Pro account for this smart house project. The first step is to add devices to your Sinric Pro account.
In the following article, I have already explained how to configure Sinric Pro and how to add devices.
Program ESP32 using Arduino IDE
In my tutorial video, I described in detail how to use the Arduino IDE to program the ESP32.
- Update the File -> Preferences –> Aditional boards Manager URLs: https://dl.espressif.com/dl/package_esp32_index.json, http://arduino.esp8266.com/stable/package_esp8266com_index.json
- Click Here to download the ESP32 board or install it from the Board manager.
- Download the required libraries from the following links:
- Sinric Pro by Boris Jaeger
- WebSockets by Markus Sattler (minimum Version 2.3.5)
- ArduinoJson by Benoit Blanchon (minimum Version 6.12.0)
For more information, visit the GitHub page of Sinric Pro. We recommend downloading the most recent versions of these libraries from the provided links. After that, install the libraries at Arduino IDE – Sketch – Include Library – Add Zip Library.
Code for ESP32 home automation system
In the code, enter the APP KEY and APP SECRET with the Wi-Fi name and Wi-Fi password.
Under the Credentials menu in the Sinric Pro account, you can find the APP KEY and APP SECRET.
#define WIFI_SSID         "YOUR-WIFI-NAME"
#define WIFI_PASS         "YOUR-WIFI-PASSWORD"
#define APP_KEY           "YOUR-APP-KEY"
#define APP_SECRET        "YOUR-APP-SECRET"
Then enter the device id in the code. In the Devices menu, you will find the Device IDs.
//Enter the device IDs here
#define device_ID_1   "SWITCH_ID_NO_1_HERE"
#define device_ID_2   "SWITCH_ID_NO_2_HERE"
#define device_ID_3   "SWITCH_ID_NO_3_HERE"
#define device_ID_4   "SWITCH_ID_NO_4_HERE"
As I am using a free Sinric pro account, so I can get only the 3-device IDs. (Sinric Pro gives 3 devices for FREE)
Uncomment the following line if you use pushbuttons (momentary) instead of latched switches.
//#define TACTILE_BUTTON 1For connecting the Sinric Pro Account with Amazon Alexa and Google Home App, please refer to the following articles after uploading the code to ESP32.
By following all these steps, you can now use Google Assistant and Alexa to control your appliances.
ESP32 control Relay with Amazon Alexa
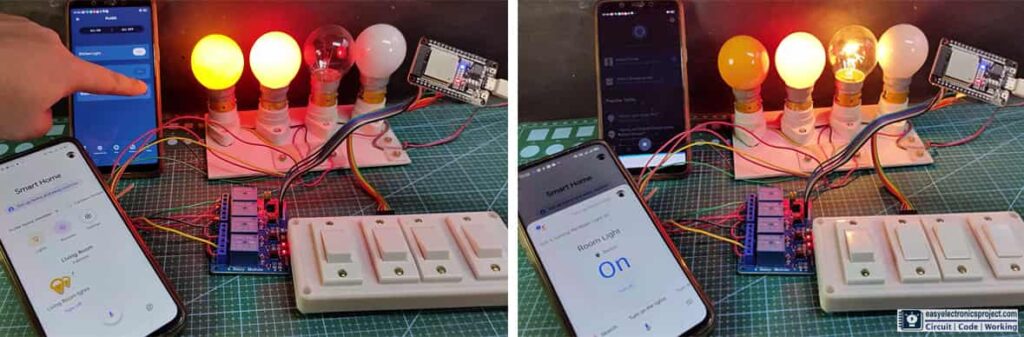
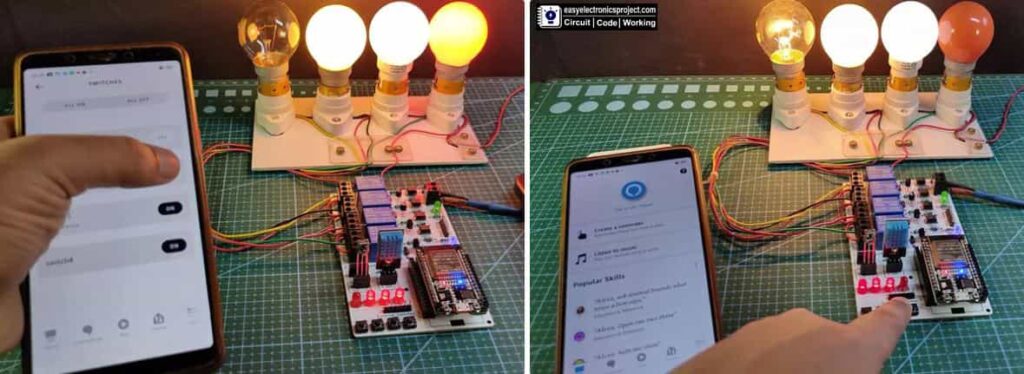
If the ESP32 is connected to Wi-Fi, you can ask Alexa, to turn on the light [“Alexa, Turn ON Room Light“]. With Alexa App, you can control appliances like lights, fans, etc. through voice commands, and also monitor the real-time feedbacks from anywhere in the world.
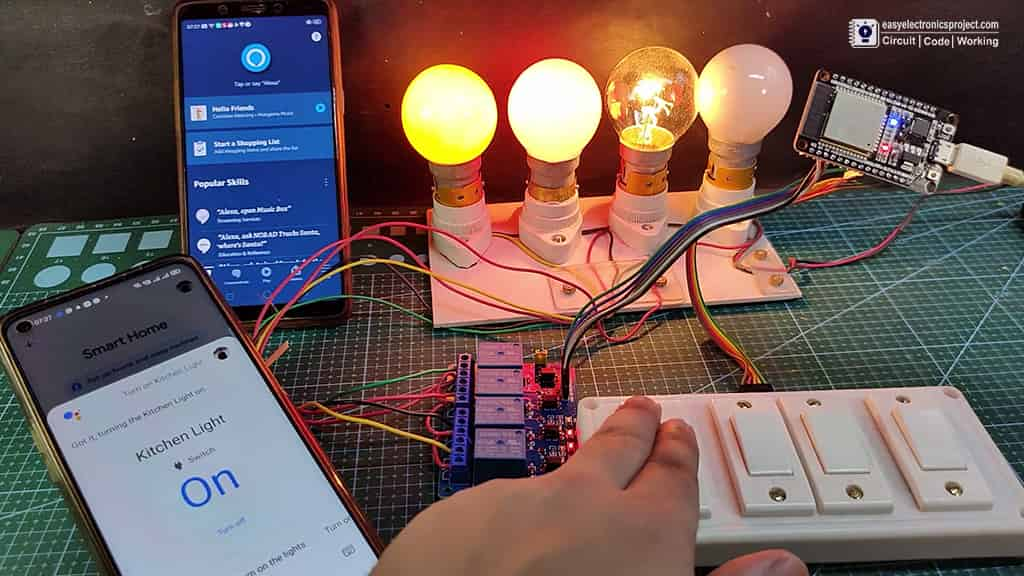
Google Assistant control Relay using ESP32
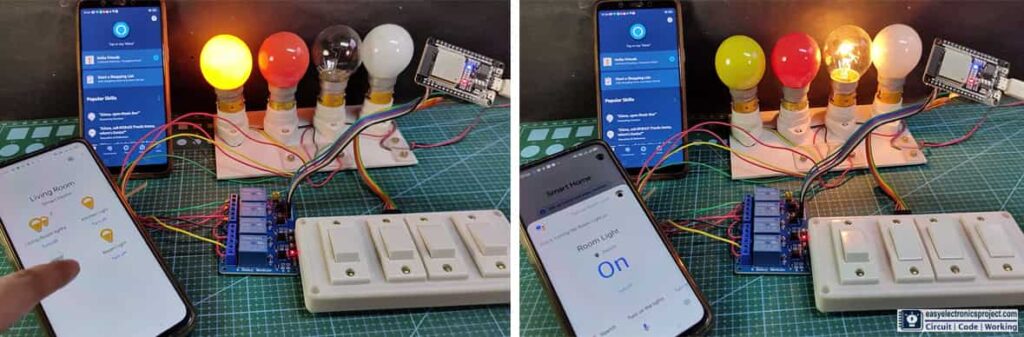
You can also ask Google Assistant to turn on the room light [“Hey Google, turn on the room light”]. By using the Google Assistant, you can control appliances such as lights and fans, and access real-time feedbacks from anywhere using the Google Home app.
Manually control relays with Switches
You can always control the relays with switches or pushbuttons and monitor the real-time feedbacks in Google Home and Alexa App.
As I said, you can also use PCB for this project to give a profetinal look.
Please share your feedback on this ESP32 project and also let me know if you have any queries.
You can also subscribe to our newsletter to receive more such useful electronics projects through email.
I hope you have liked this electronics project, Thank you for your time.
