Description:
In this ESP32-CAM project, we will make a Motion sensor camera with ESP32CAM and PIR Motion Detector sensor. All the pictures will be stored in the microSD card connected with the ESP32-CAM.
As we will use the Deep Sleep mode of the ESP32CAM so the circuit will consume very little power. And you can use the circuit continuously without any problem. So this is a very useful electronics project.
I have shared the esp32-cam pinout, esp32 PIR motion sensor circuit diagram, esp32 PIR sensor program, and how the esp32-cam deep sleep works. So, you can easily make this esp32-cam project at home.
Circuit Diagram of ESP32-CAM project:
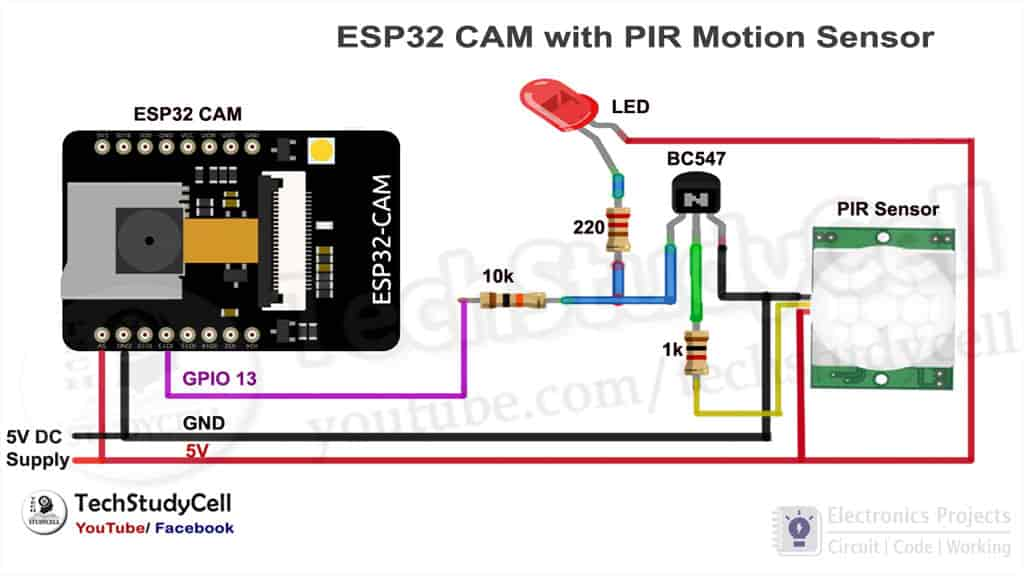
We can easily design this motion sensor with a photo capture circuit using ESP32-CAM, PIR sensor, and some basic electronics components. And we can easily supply this circuit with a 5V DC charger.
Component Required for this ESP32-CAM project:
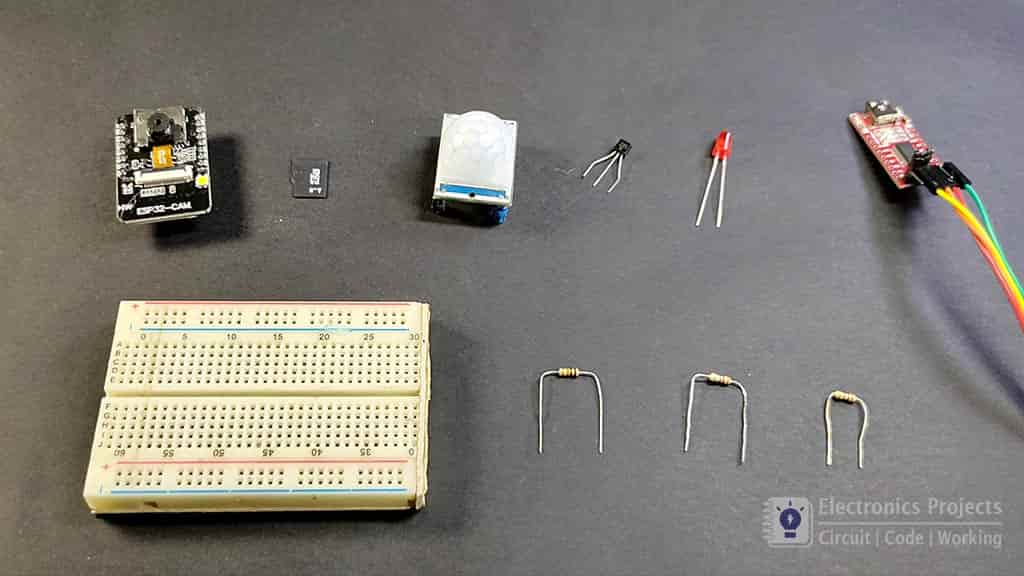
- ESP32-CAM (AI Thinker)
- PIR Motion Sensor Module
- BC547 NPN Transistor
- 220ohm, 1k, 10k Resistor.
- LED 5-mm
- FTDI 232 USB to Serial Interface board
- 5 volt DC supply
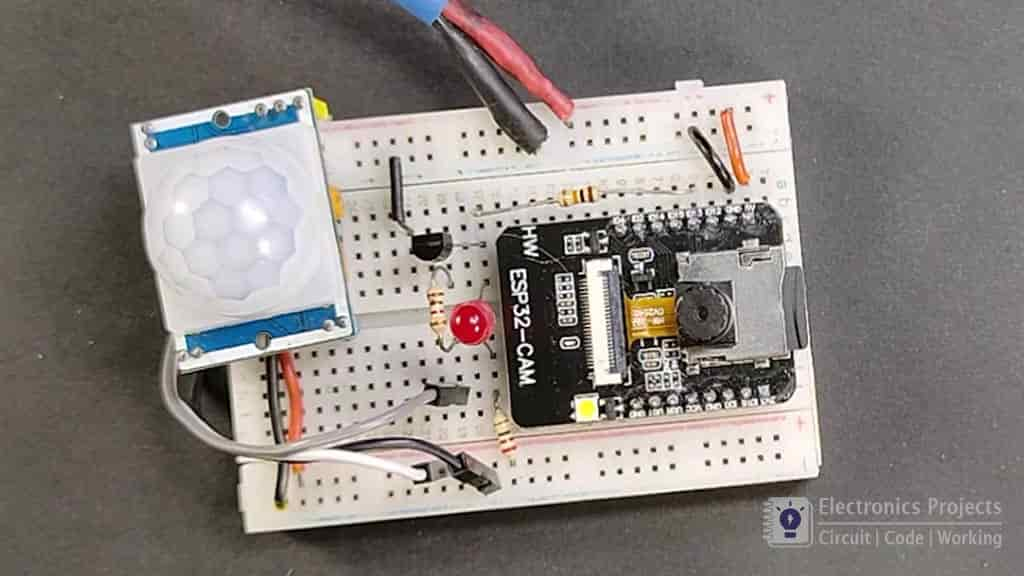
Breadboard Schematic for this ESP32-CAM project
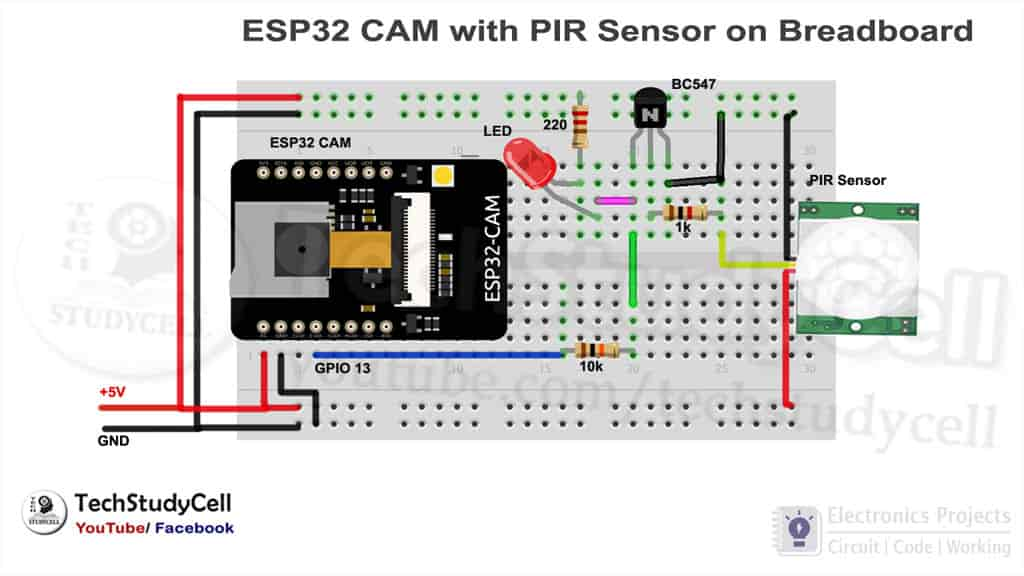
This the breadboard schematic of the motion sensor camera with ESP32CAM projects. This will help you to design the ESP32CAM PIR circuit on the breadboard.
Working Principle:
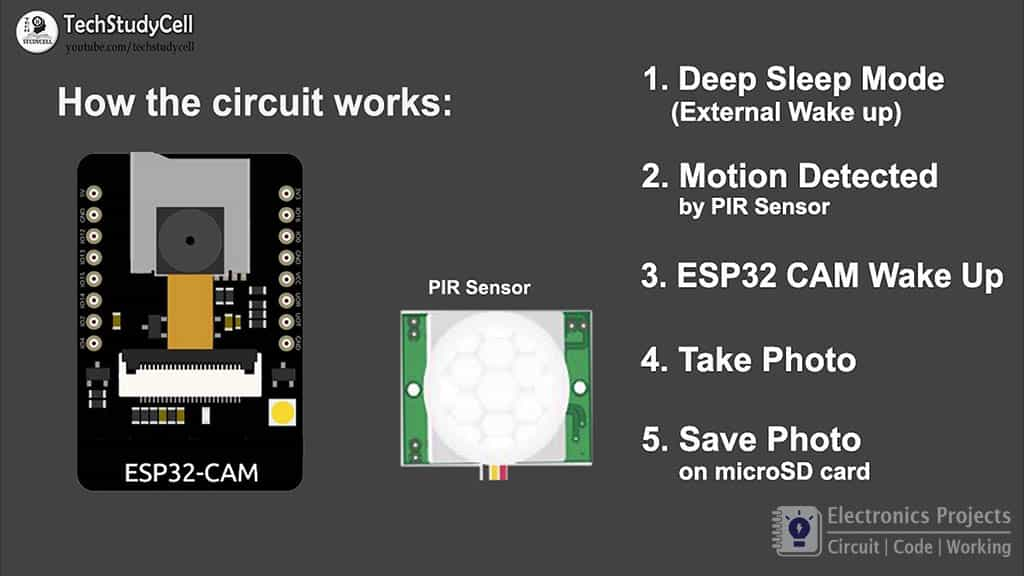
Lets understand how this ESP32CAM circuit works:
The ESP32CAM is in Deep-sleep mode with external wake-up enable at PIN 13.
Whenever the PIR sensor sense any motion within the range the output pin of the PIR sensor becomes high.
As the output pin of the PIR sensor is connected with the ESP32CAM pin 13 so ESP32CAM gets the wakeup signal.
The ESP32CAM wakes up and take the picture. The picture stored to the microSD card connected with ESP32CAM.
After some millisecond delay, the ESP32CAM again goes to the Deep Sleep Mode until it gets the next wake-up signal at pin 13.
Thus this circuit consumes very little power and takes the picture only when any motion detected by the PIR sensor.
Related Video for this ESP32-CAM project:
I will highly recommend to watch the video on this ESP32 project as I have discussed ESP32CAM pinout, how the ESP32 circuit works, how to program the ESP32CAM with USB to serial interface board etc. So this will help you make the ESP32CAM project at home.
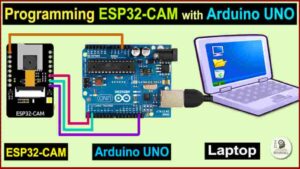
Programming ESP32CAM
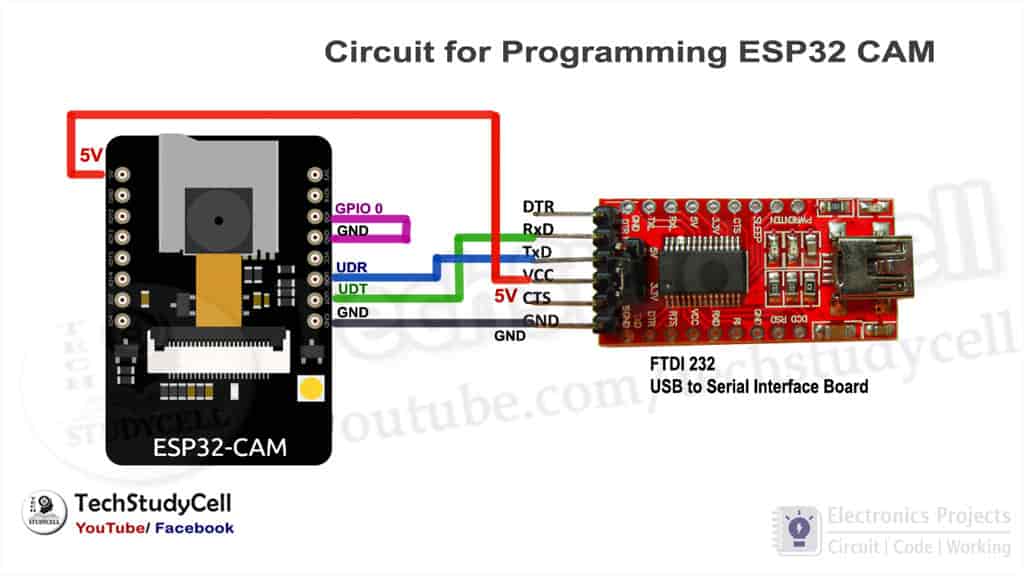
To program the ESP32CAM, I have used FTDI232 USB to Serial interface board. I have connected the FTDI232 with ESP32CAM as per the above circuit.
While uploading the code we have to connect GPIO 0 with the GND pin of ESP32CAM.
Before uploading the code to ESP32CAM, please check the following setting:
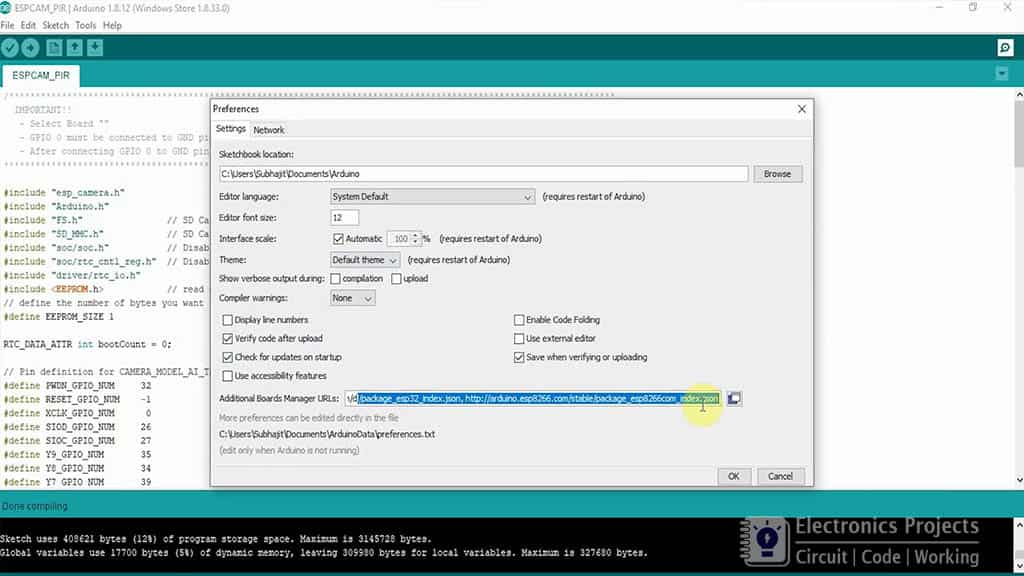
- Update the Preferences –> Aditional boards Manager URLs: https://dl.espressif.com/dl/package_esp32_index.json, http://arduino.esp8266.com/stable/package_esp8266com_index.json
- Board Settings:
- Board: “ESP32 Wrover Module”
- Upload Speed: “921600”
- Flash Frequency: “80MHz”
- Flash Mode: “QIO”
- Partition Scheme: “Hue APP (3MB No OTA/1MB SPIFFS)”
- Core Debug Level: “None”
- COM Port: Depends On Your System
- GPIO 0 must be connected to GND pin while uploading the sketch
- After connecting GPIO 0 to GND pin, press the ESP32 CAM on-board RESET button to put the board in flashing mode
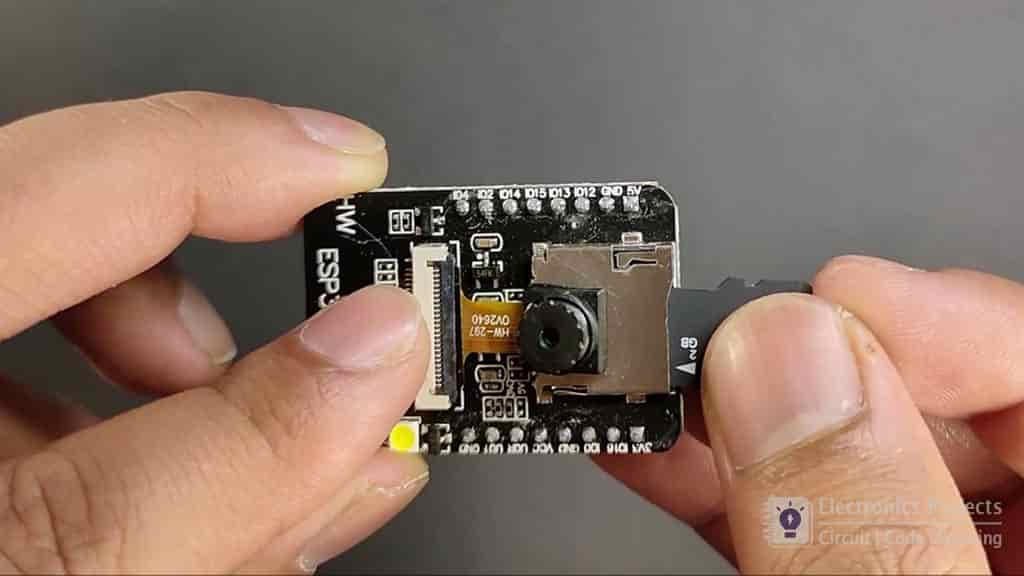
Insert the microSD card
Complete the Circuit:
Complete the circuit as per the circuit diagram. Here I have used 5-volt mobile charger as a power supply for this ESP32CAM project.
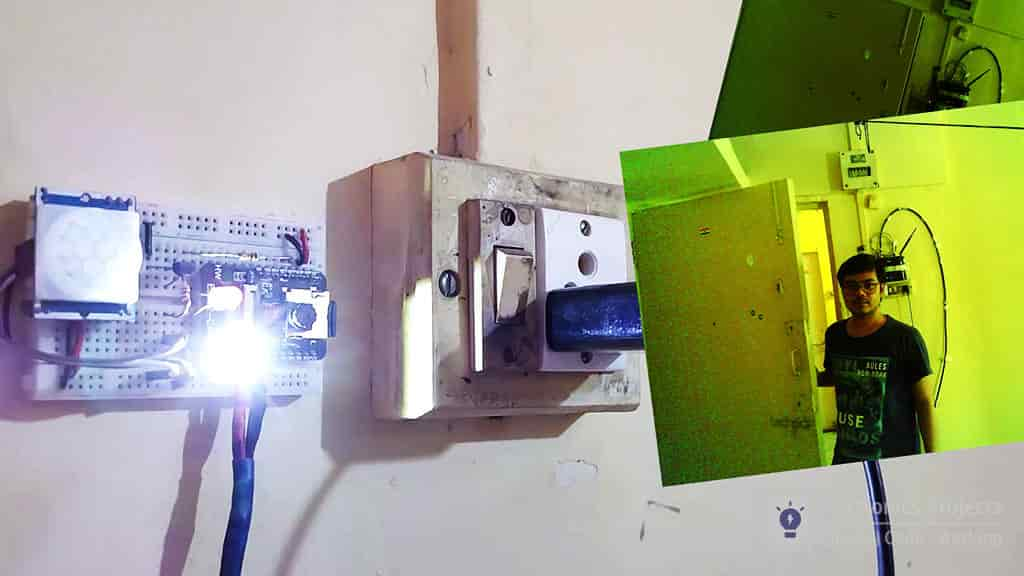
Use the ESP32CAM as Security Camera
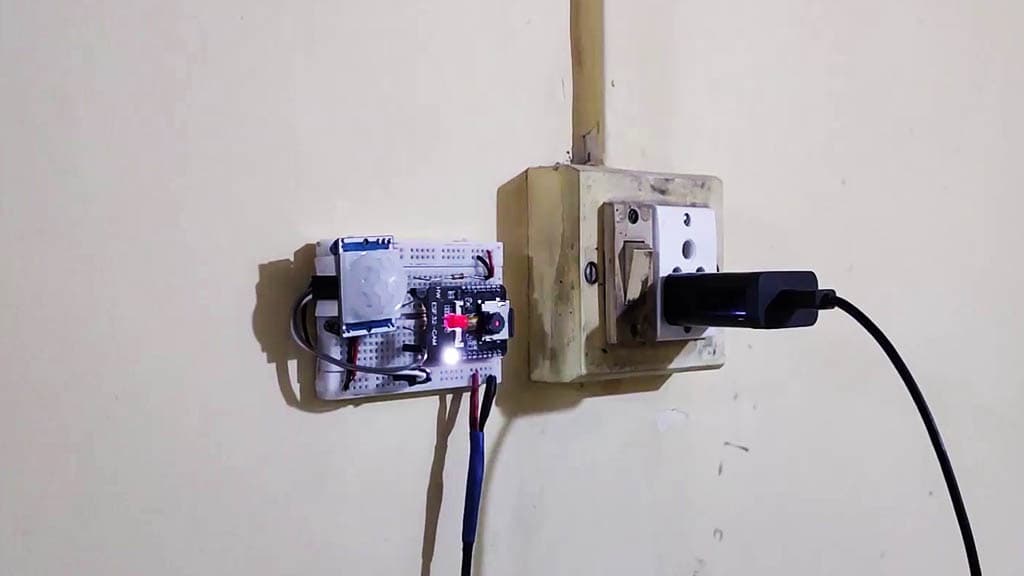
Here I have fitted the ESP32CAM infront of the main door. So when somone enter or exit from the main door ESP32CAM will take the picture and store it to microSD card.
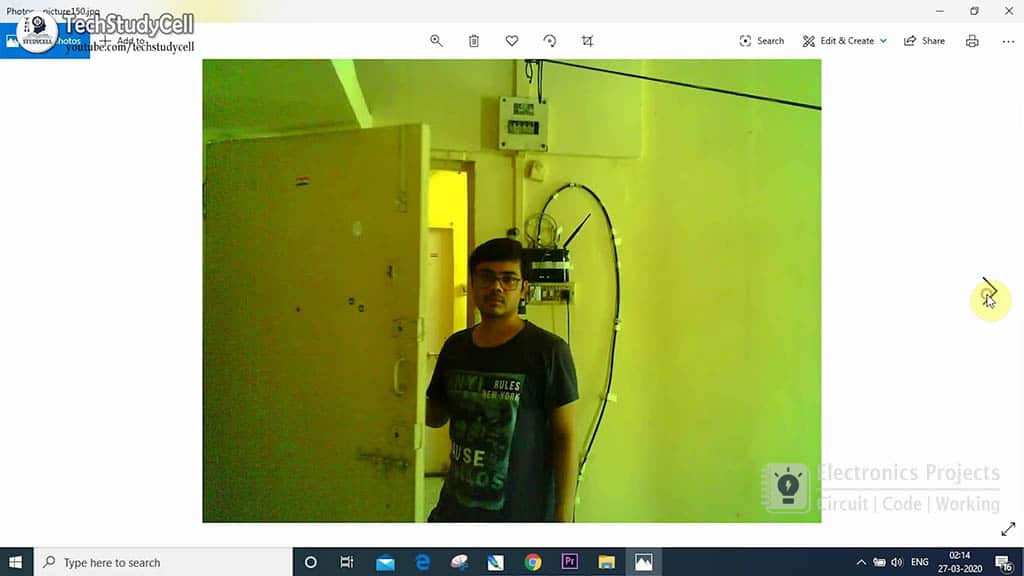
Pictures, taken by the ESP32CAM
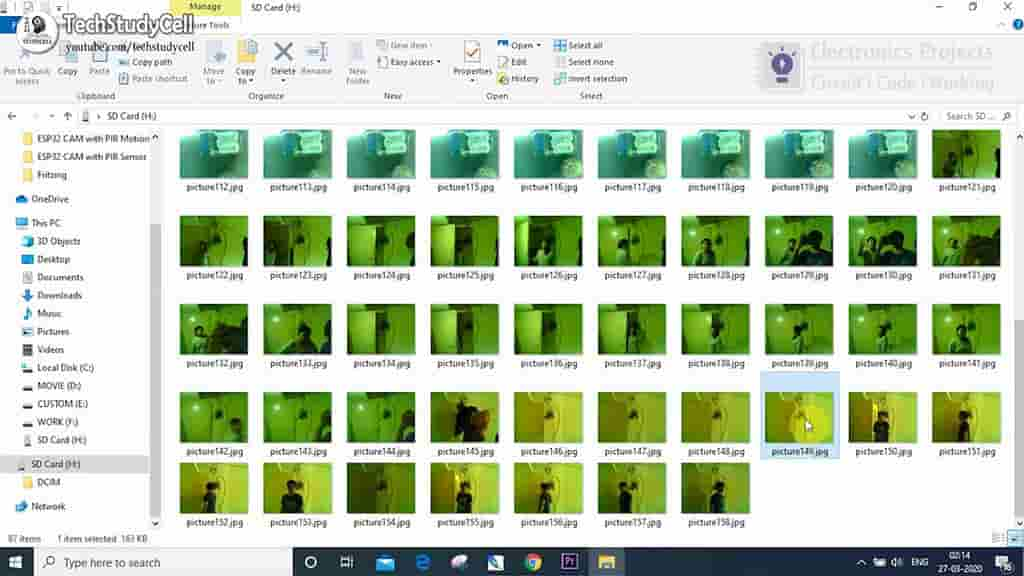
Anytime we can remove the microSD card from ESP32CAM and connect the microSD card with laptop to see the pictures.
So this is a very useful ESP32 camera project using ESP32-CAM, PIR motion sensor and some basic electronics components. This ESP32 CAM projects also can be used as DIY Security camera.
Hope you like this ESP32-CAM PIR Motion Detector with Photo Capture project.
You can also subscribe to our newsletter to receive more such useful electronics projects through email.
Please do share your feedback on this ESP32 project. Thank you for your time.